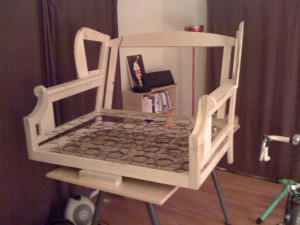
I have a long story about building a chair. The major issue I had with the project was that when it comes to upholstered furniture, there is a multitude of resources around to help you reupholster existing furniture, but very few that explain the construction of upholstered frames from scratch.
There was one (and only one) book in the Seattle Public Library, a furniture design textbook from the 1950s that actually had design reference points specifically for the upholstery framing. one of these days I have to go back and get the title and info, and I’ll pass it along. It was astonishing to me that all the reupholstery books tended hide the frames, and made a specific point about the inadvisability of ever uncovering the frame.
for anyone who might care, the most useful bits in the frame are the vertical bars just inside the edges of the back, and the horizontal bars right above the seat frame at the bottom of the arms. technically these parts aren’t necessary, but they make the process soooo much easier. especially the arms.
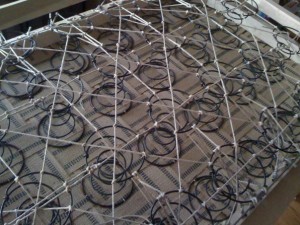
the most tedious part of the whole process was the spring tying. helpful hint, a jig made made up of a couple of 1″x1″ with a spacer between makes the first tie much, much easier. the way upholstery springs generally work, you are supposed to tie the springs down and pre-tension them to create the initial firmness in the deck. using the jig, you can press down on the springs to the proper height, force the front springs out the front edge, then just casually tie them into place. see the linked article for details, follow it carefully, it’s the best resource I’ve found for the spring tying step.


Pingback: Things Made