Finally got the internal fixtures sorted
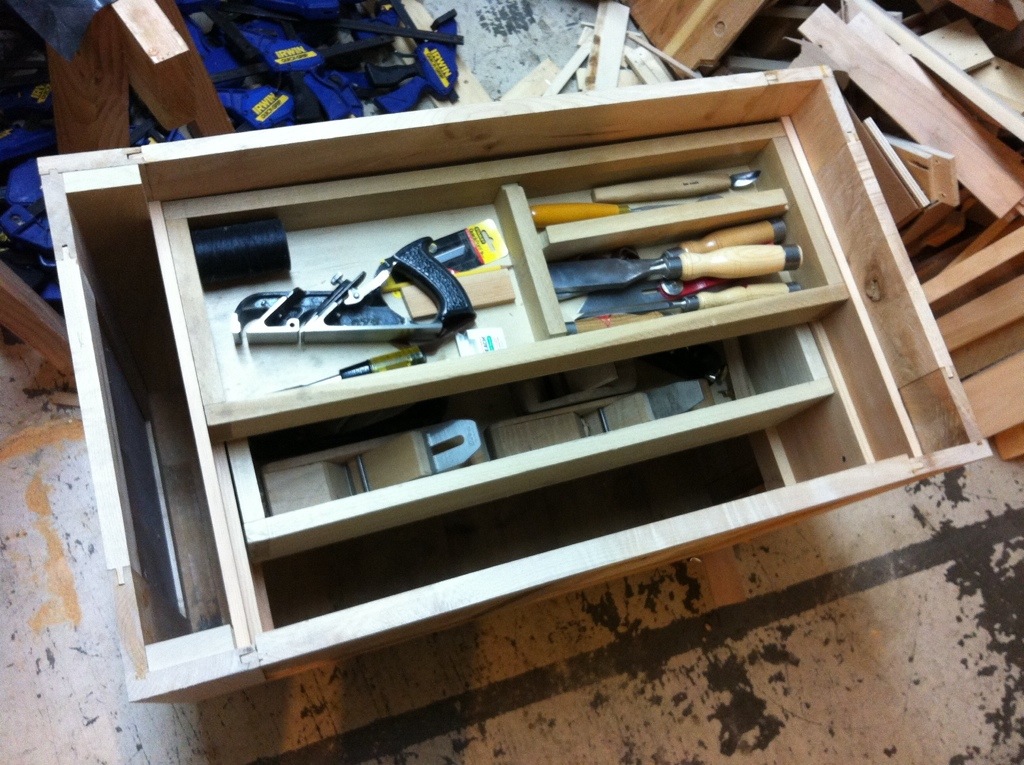
Needs skirt, rim and a lid. Some saw fixtures and chisel rack also. But well along finally…
Tool Chest
Leave a reply
Finally got the internal fixtures sorted
Needs skirt, rim and a lid. Some saw fixtures and chisel rack also. But well along finally…
And now finally, it lives in its permanent home. the fir should darken somewhat with age to match the rail caps.
and the finished product!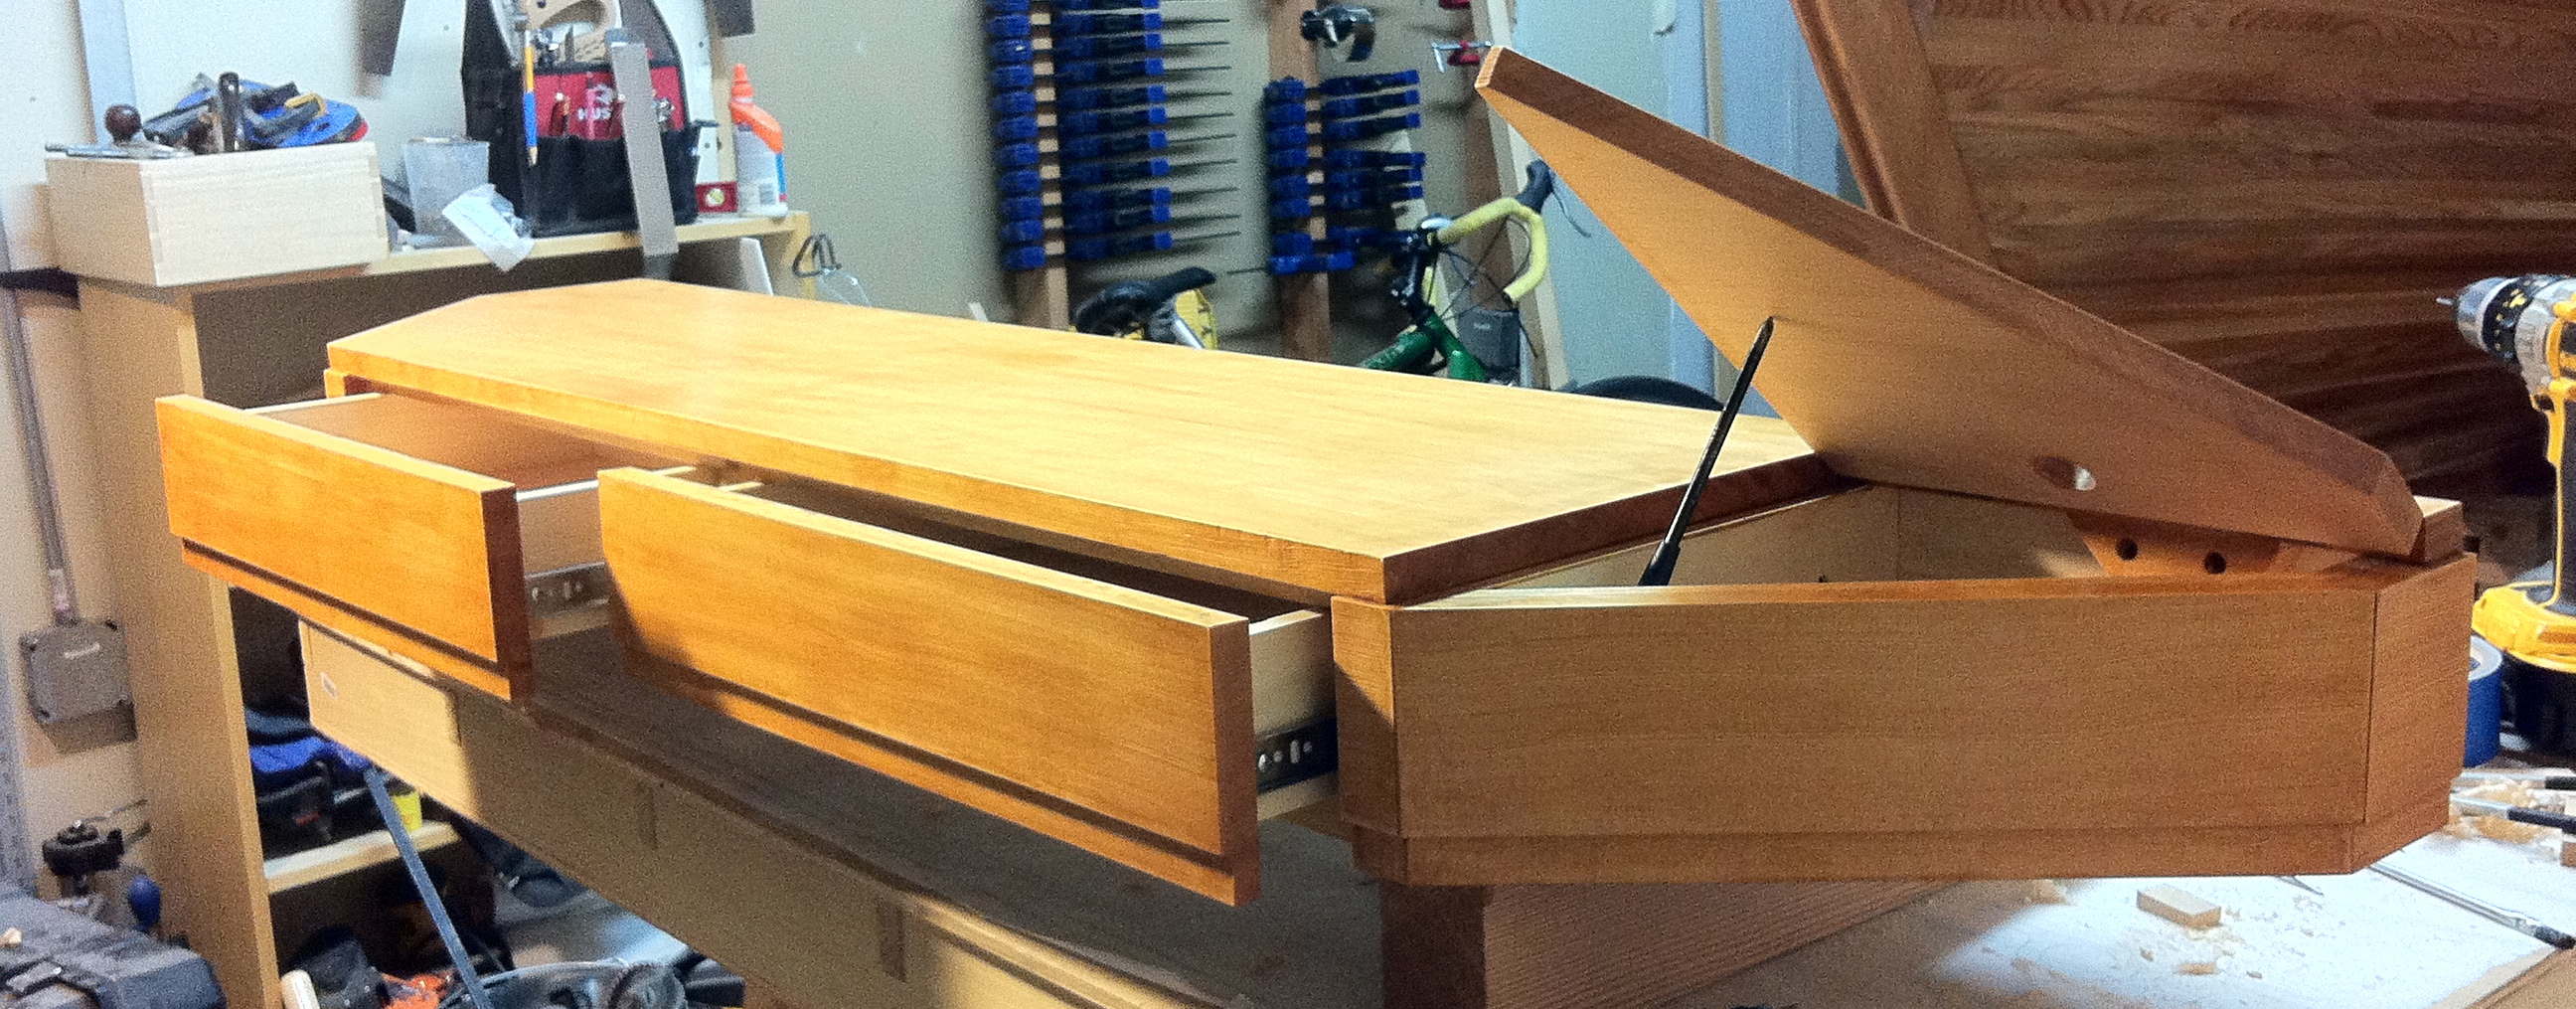 two drawers in the middle section and a cubby down one end to hold phones and chargers.
the finish was interesting. the trim I was to match turned out to be orange shellac coated in clear polyurethane. however the lac beetles are falling down on the job and orange shellac is apparently hard to come by.
as an alternative, I used two coats of amber shellac, (easily available,) well sanded. then a coat of reddish tinted polyurethane (prairie wheat) and a clear polyurethane final coat. note that the shellac can specifically suggests this is a bad idea, but the guy at Rockler insisted this was the norm… go figure.
An actual paid gig! so slight delay in boat building.
here’s the structure of a built-in desk so far:
 lots and lots of dovetail joints. 20 by my count, plus a couple of mortise and tenon joints. (the space around the drawers is for metal drawer slides per client request.) clamping non-90-degree dovetail joints is an incredible pain in the ass. sadly most of the joinery will get covered by a facia or drawer fronts.
the desk will be cantilever, bolted to the wall and the section to the far right will have a flip up cover to store things like phones and chargers. there will be a pass through hole from the bottom for the power cords and a similar hole in the top to allow for neat power cable wrangling while sitting at it using a computer and such.
the client requested a douglas fir top to match the surrounding decor, and I’m wondering what finish to use to prevent, (or at least minimize,) damage. I would have preferred to use something a bit more durable, or at least less prone to easy dents, but such are client requests.
when laying out joinery, make no joint smaller than your smallest tool. even the tiny chisels are expensive.
how is it that I have so much stuff? I filled 9 boxes with books and the bookshelf still looks full… if and when I get the shop set up again, a bunch of stackable modular bookshelves is definitely in the works. I want this to be the last time I have to pack my books…
I like the shelves that Roy Underhill showed on the Woodwright’s Shop some time back, but I think that adding a slight angle to the shelf would aid both in their mobility, and their flotation… -) but whatever, the IKEA must go…
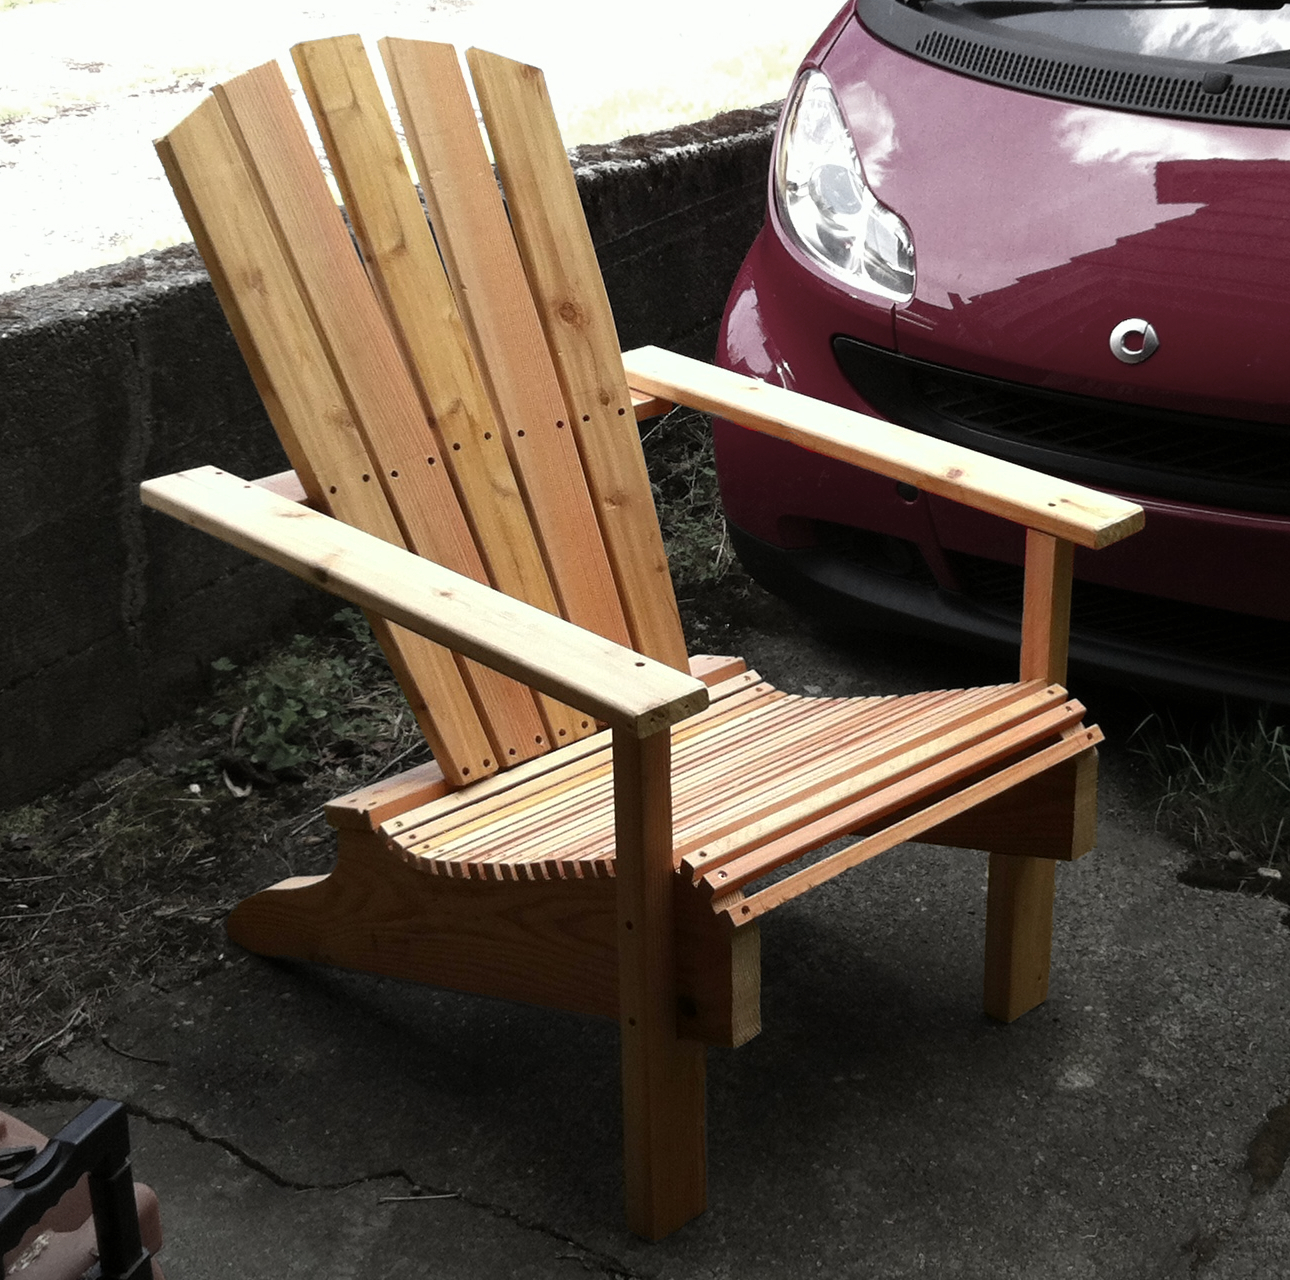
I’m told that one of the indispensable tools in a workshop is a flop chair. the concept being that you need somewhere to sit when you can’t think of what you’re supposed to do next, or have come to the inescapable conclusion that you shouldn’t have done what you just did…
this is now mine.
It’s mostly made up of what used to be parts of a mold from the early construction of the boat. so 2″x10″ scraps.
It fits me perfectly, I sat on a chair and measured up from the floor to the back of my knee for the height of the front of the seat and guessed at the rest. definitely done with little regard for aesthetics and finish, so the screw holes are not bunged, the wood in the back is whatever happened to be around at the time. happily, when you’re sitting in it, you can’t see it…
On the other hand, I now have a pattern for a chair that fits me, that I can measure and adapt when making any similar furniture. in deference to shorter people, the seat height could be a little lower, but the seat and back angle are a very good starting point for the next attempt that might actually take looks and finish into consideration.
I do have a lot more molds to dispose of…
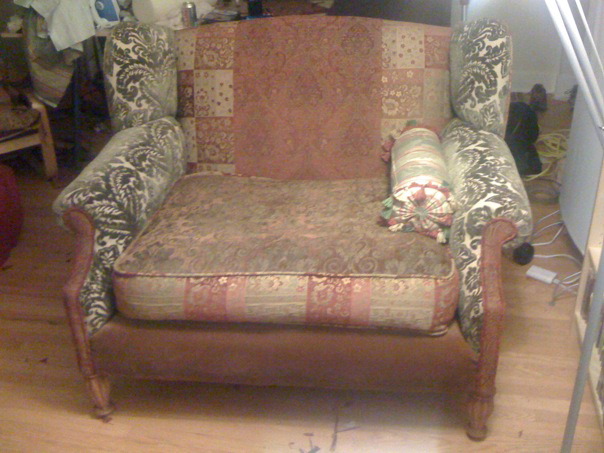
A little while ago, I posted a bit about a chair I built. One thing that was lacking about that chair was an ottoman. I actually built the frame of it a long time ago, and was convinced to let someone else finish it. now 2 or 3 years later, I got tired of waiting.
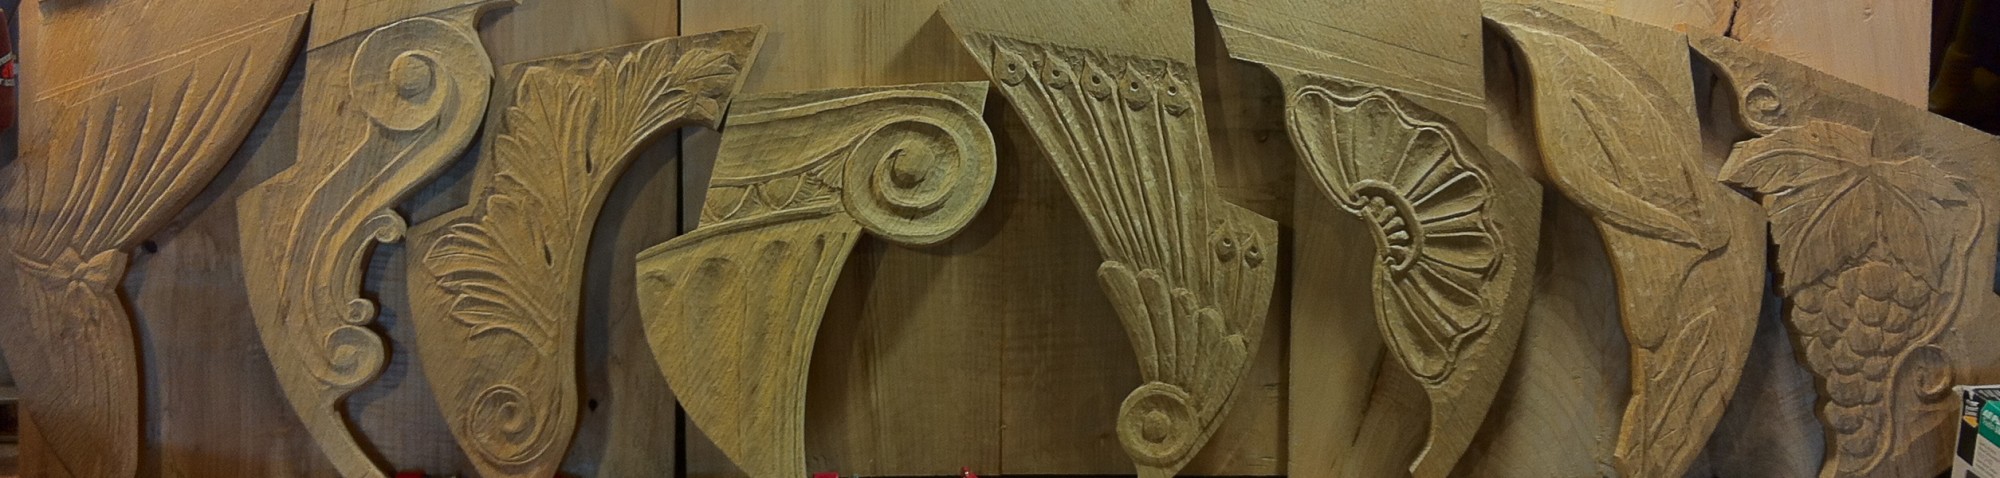
I finally finished turning and carving the legs, I finally decided that given the patchwork nature of the original upholstery job, it would be kind of fun to mismatch the legs.

On top, I decided that I would upholster this in a slightly less sprung way than the chair. The chair has a sprung deck, on top of which sits a sprung cushion, (see below.)
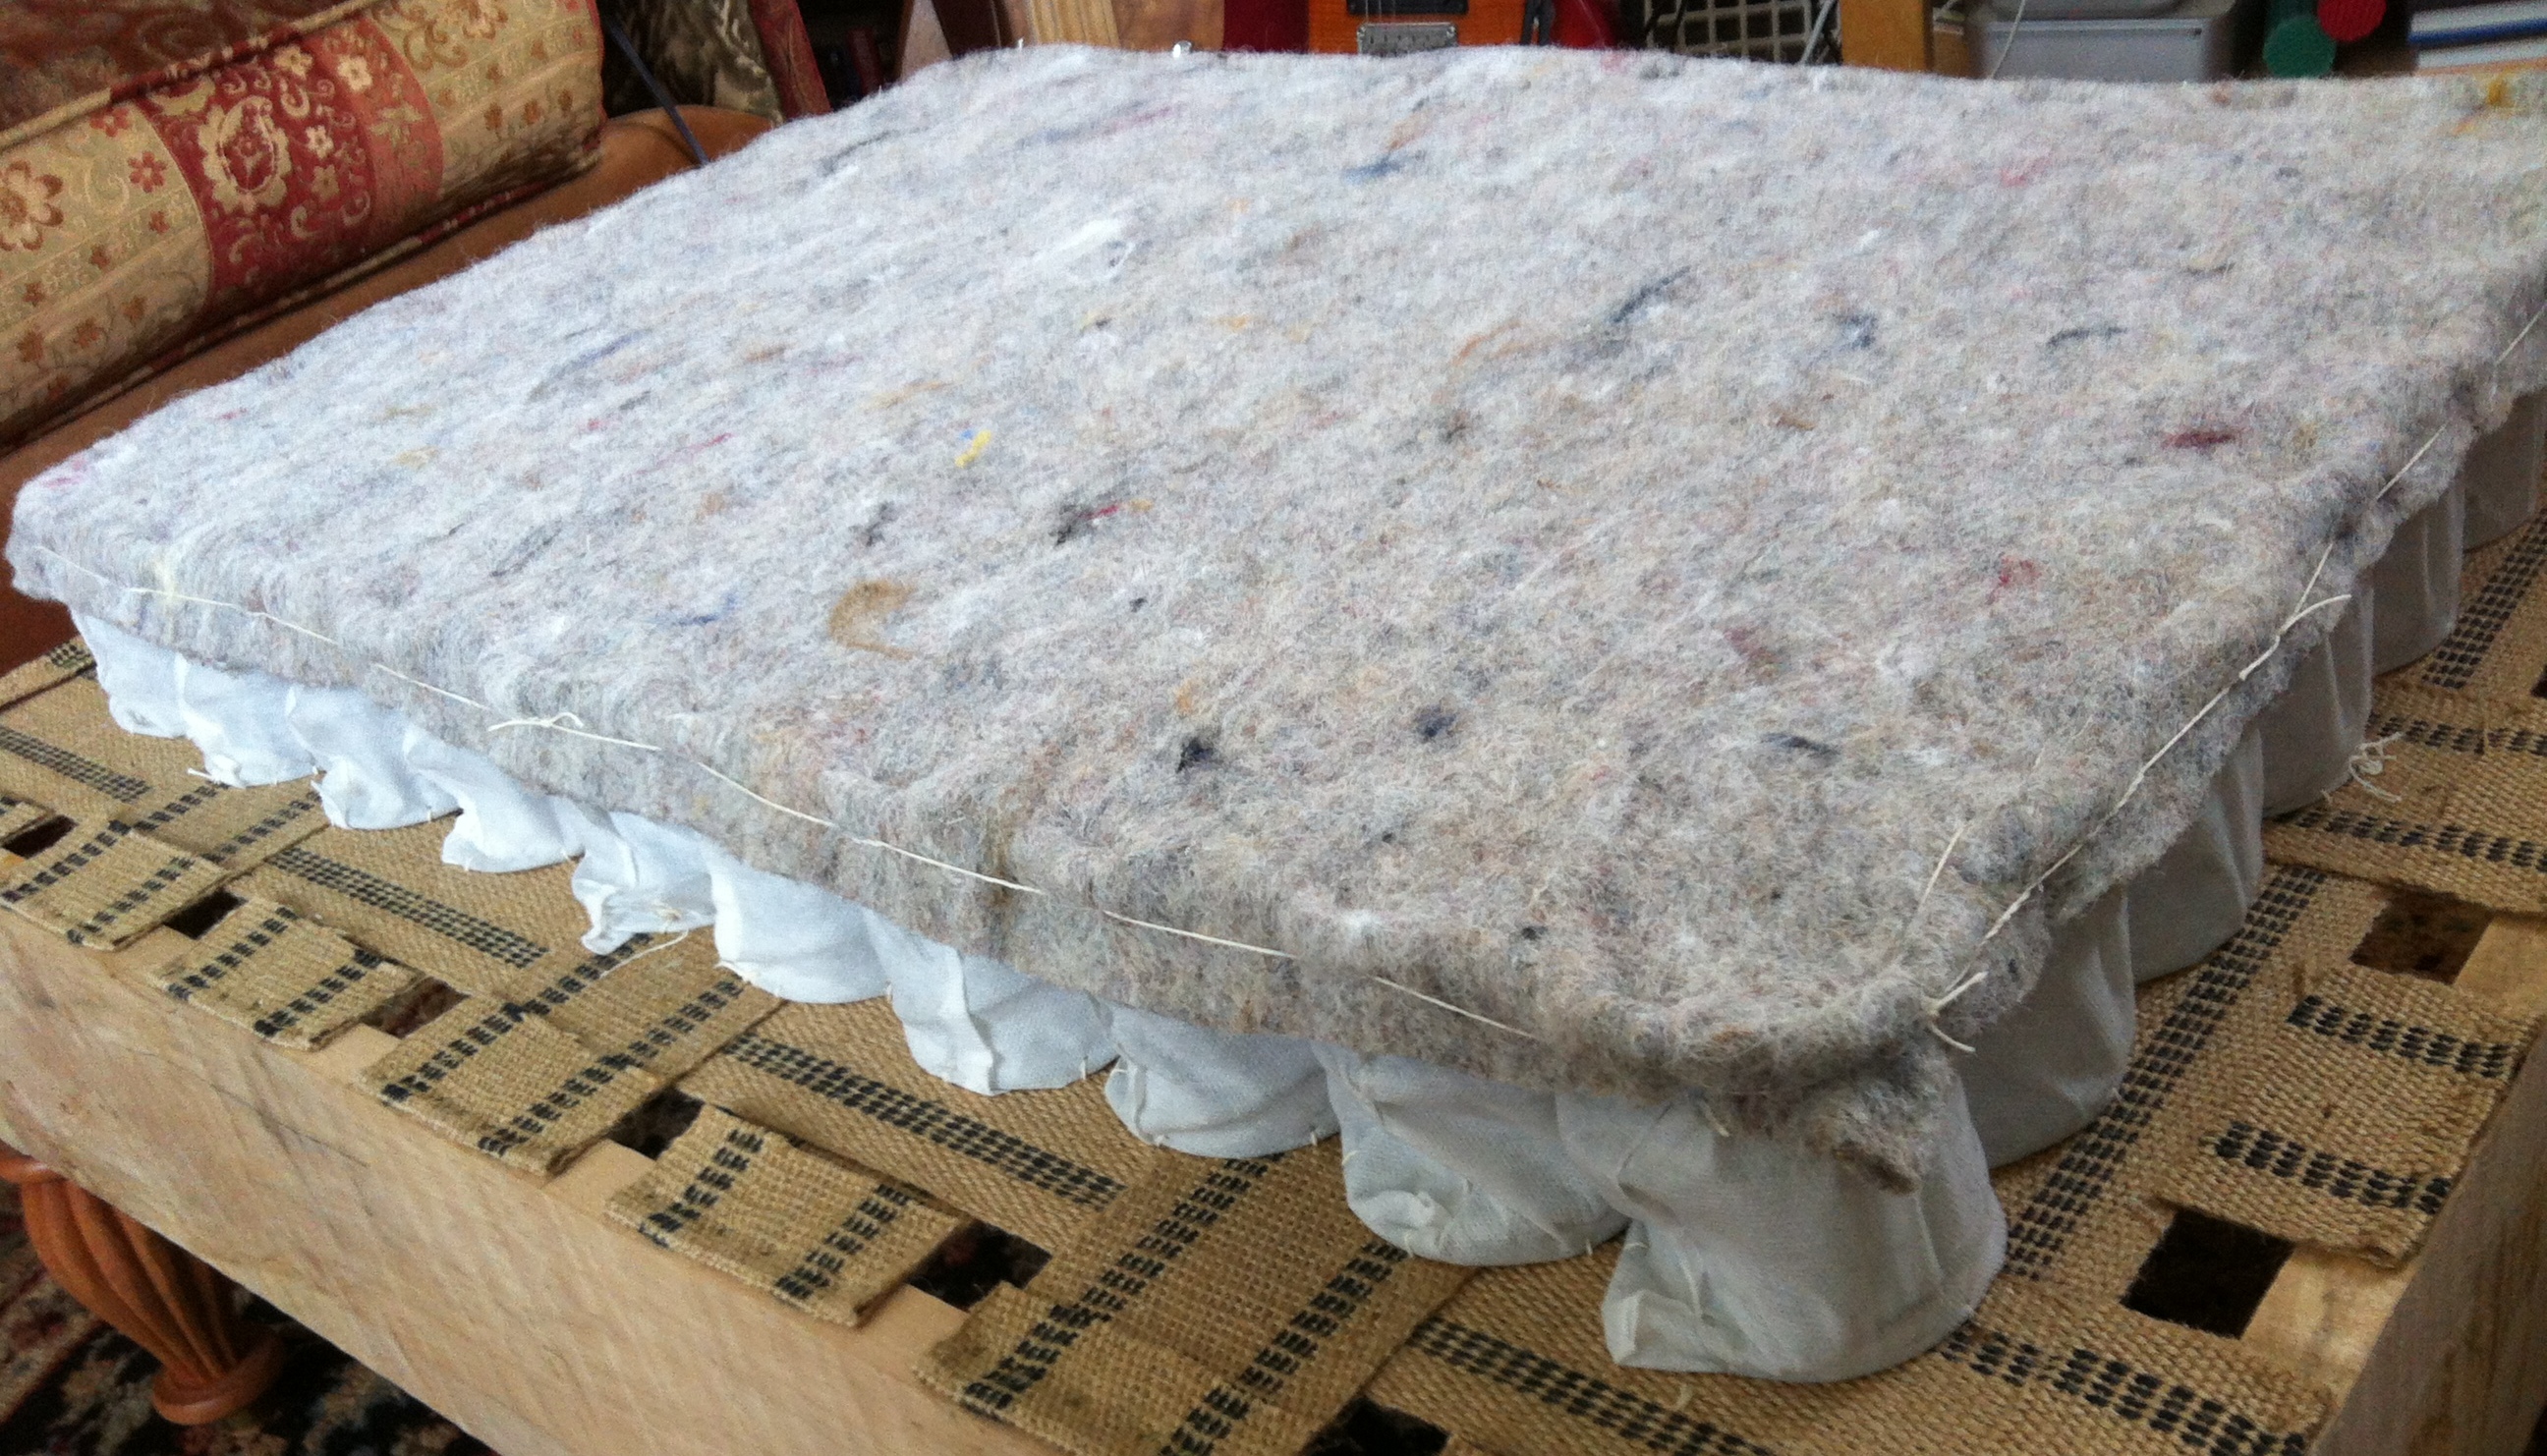
The hassock, by contrast, is getting a marshall unit, (pre-wrapped spring set,) 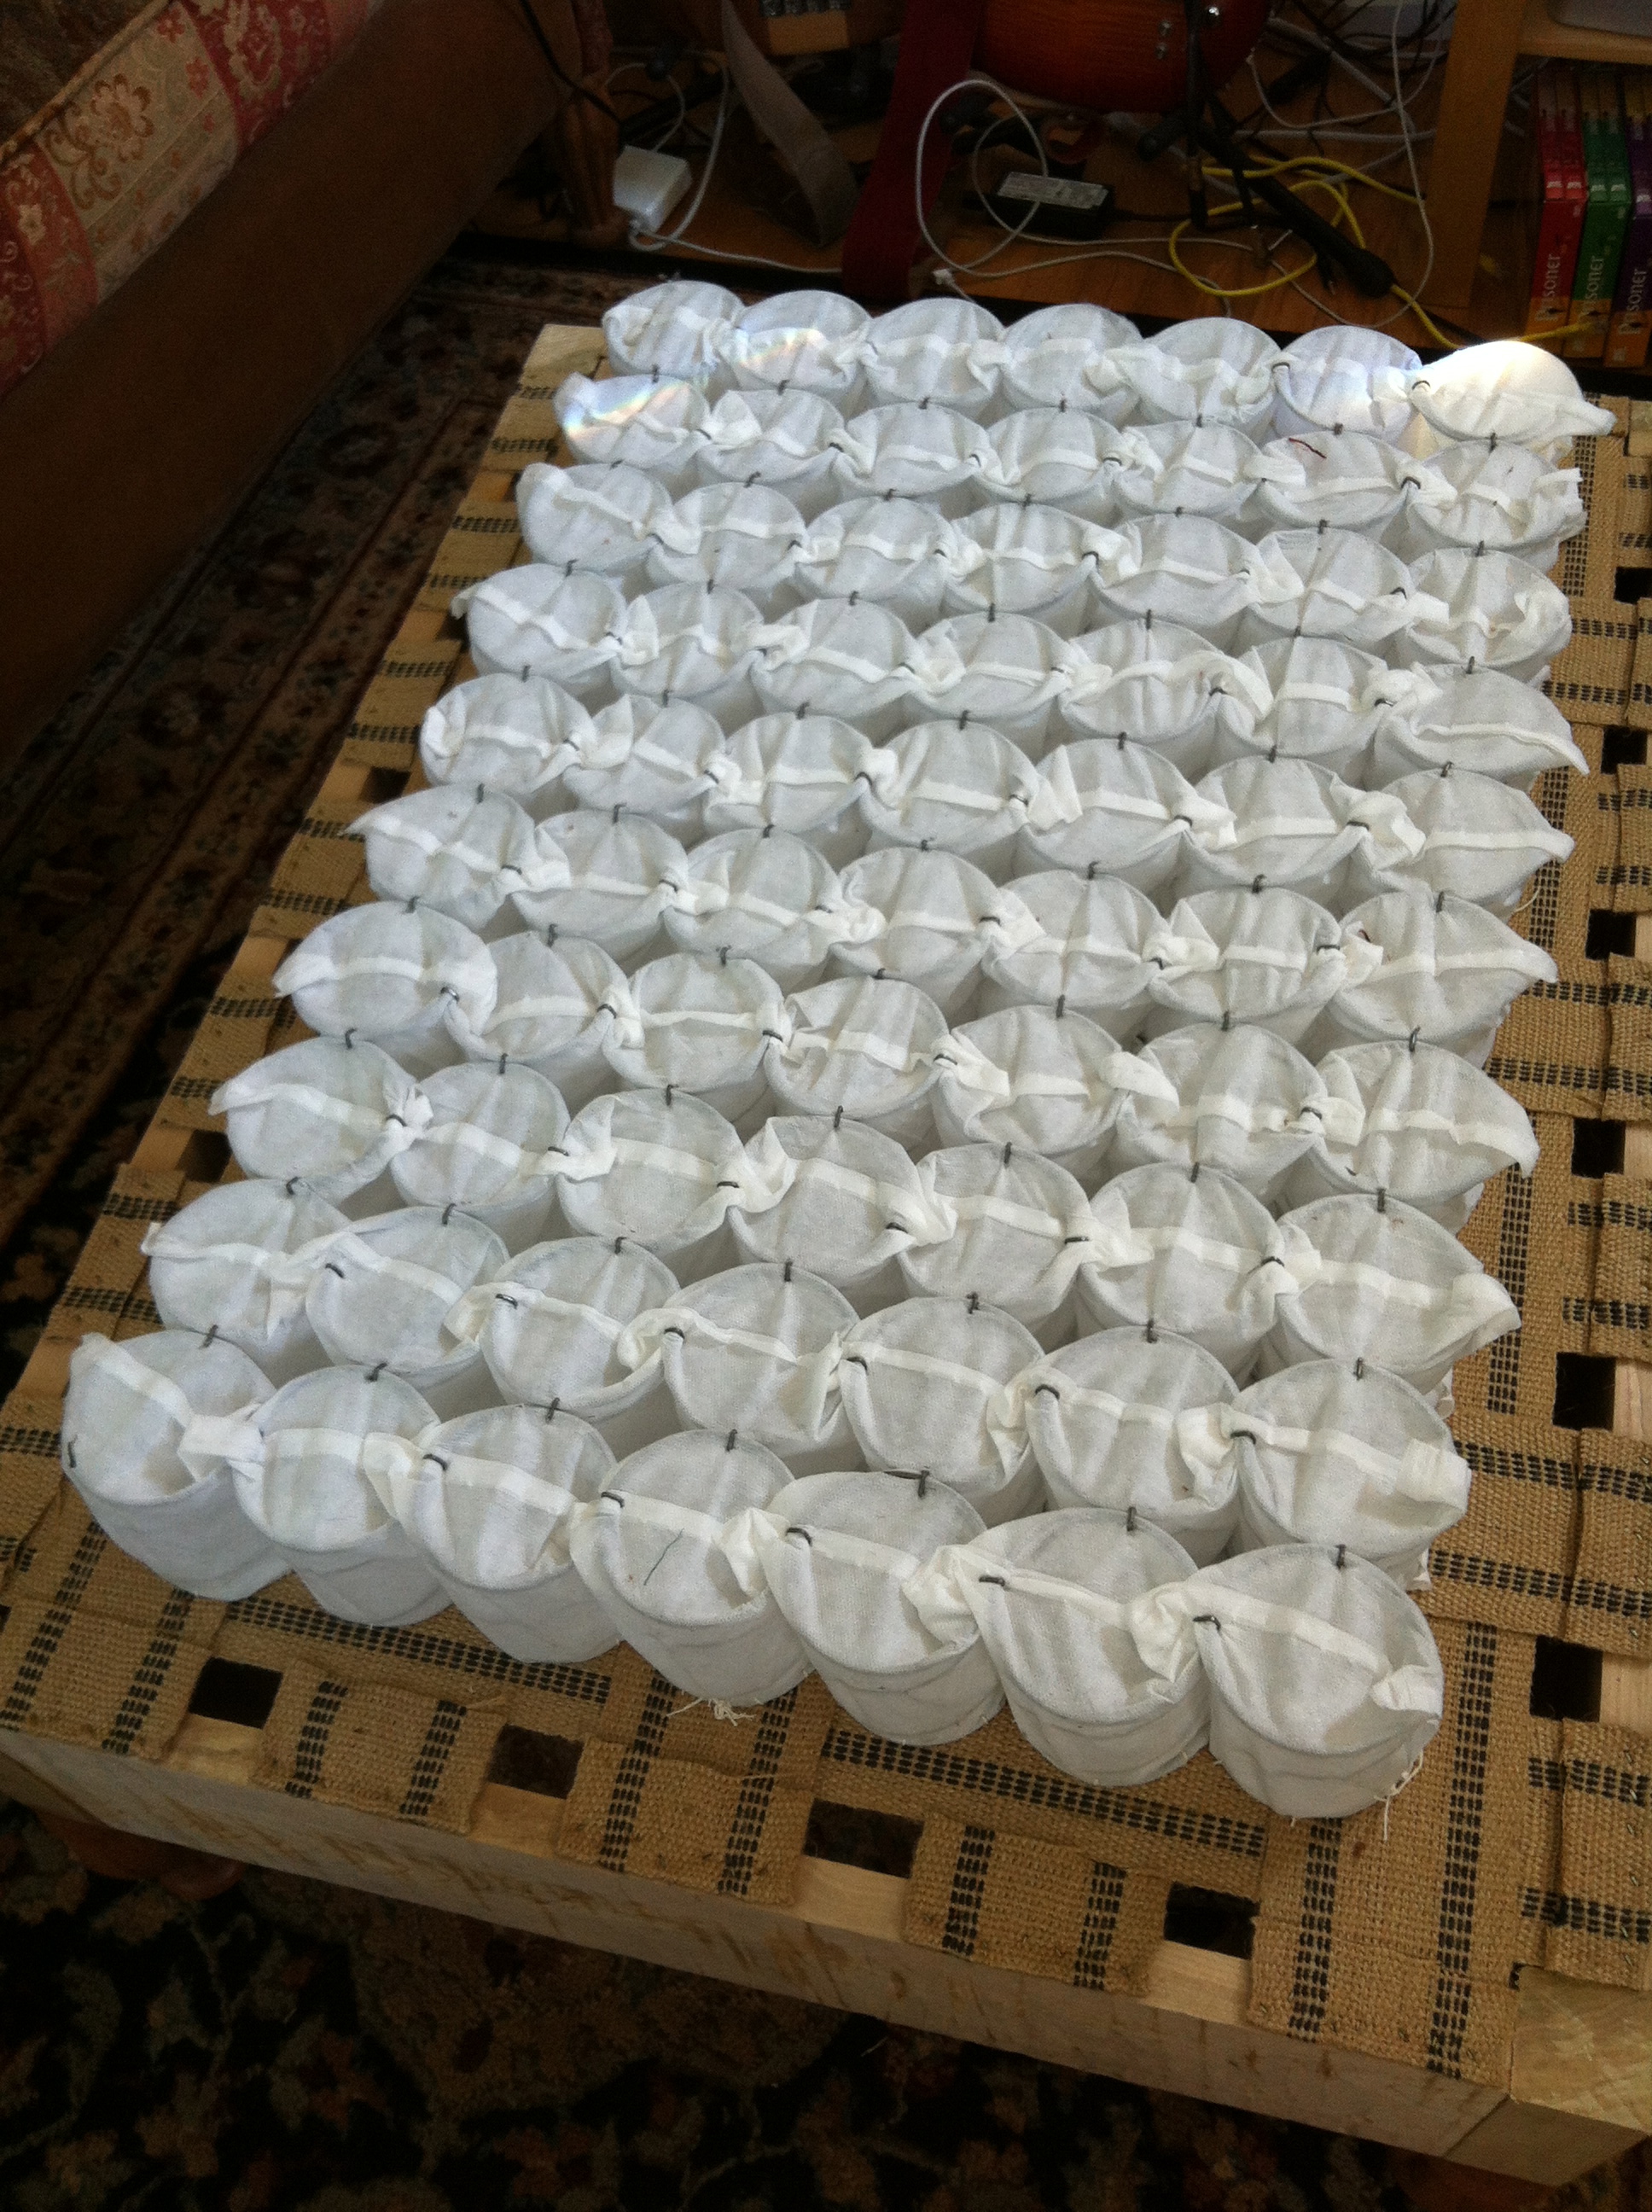 directly onto the webbing, then surrounded by felt, foam and cotton batting.
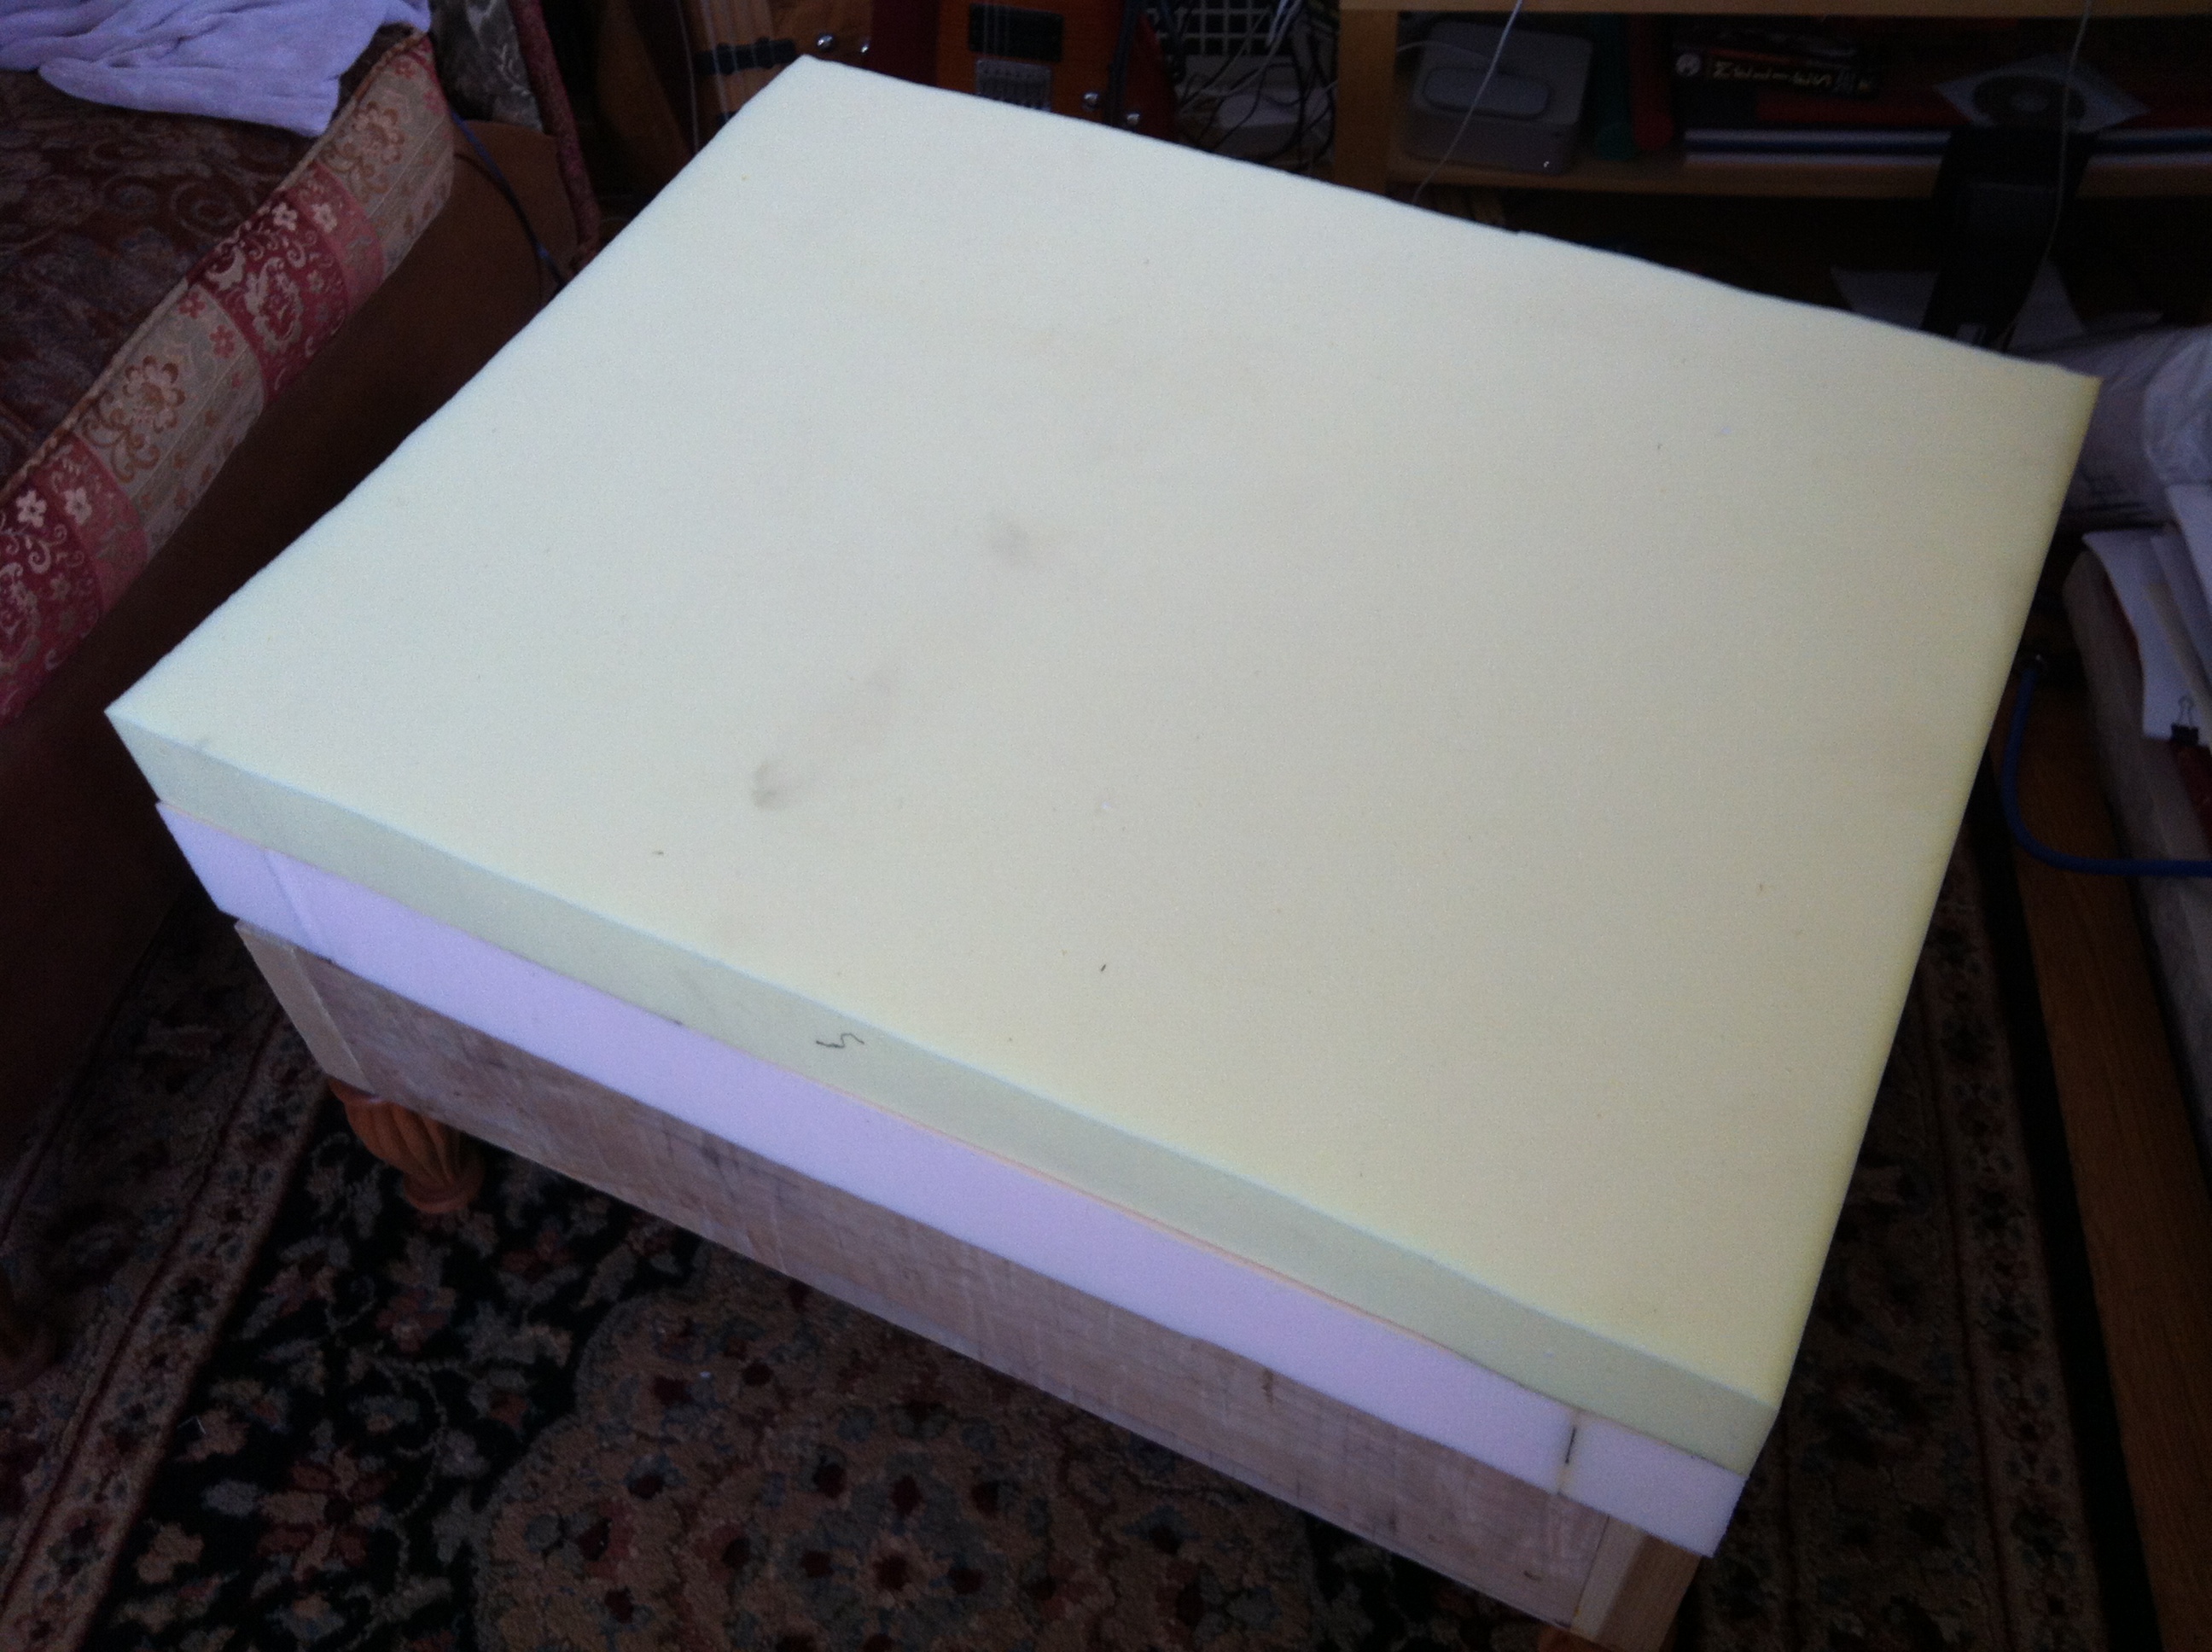 so far I’m up to the foam rubber. the next step is going to be to make a light weight calico bag for the cushion top that will encase the foam and a couple of layers of cotton batting so that I don’t have to worry about abrading the foam or messing anything up with the outer fabrics.
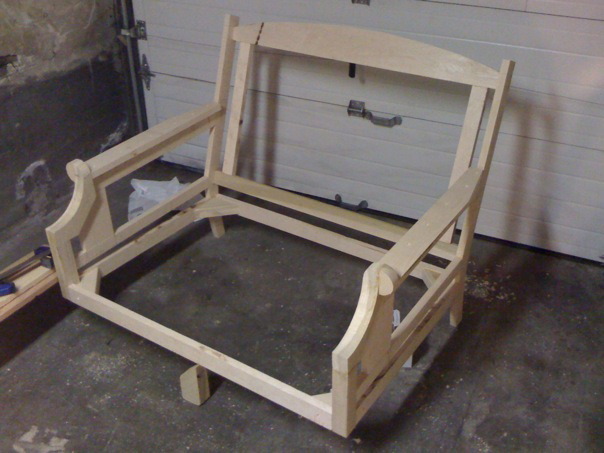
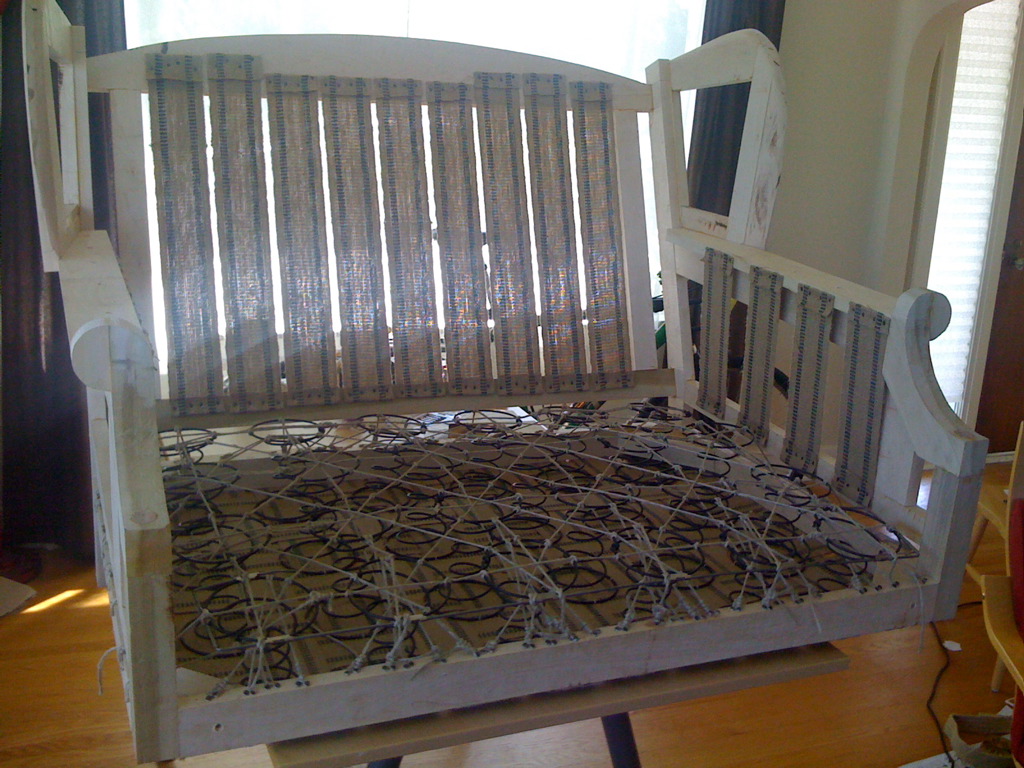
btw, here’s a basic rule of thumb about upholstery. it basically breaks down into a few simple steps. start with an uncomfortable frame. then add progressively less uncomfortable layers of padding wrapped in progressively finer fabrics until you’re done. so long as every layer is pretty secure before you go on to the next layer, the rules are pretty loose… sounds tongue-in-cheek, but it’s pretty much how it’s done. For example:
first the frame:
then webbing and springs:
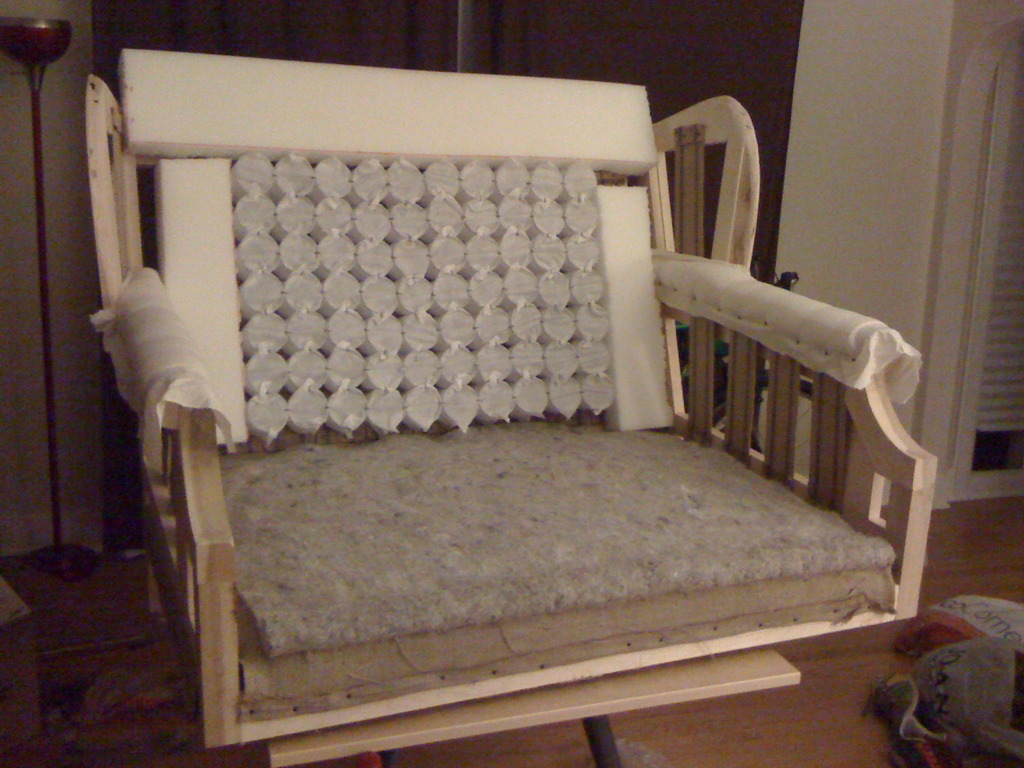
then burlap/felt:
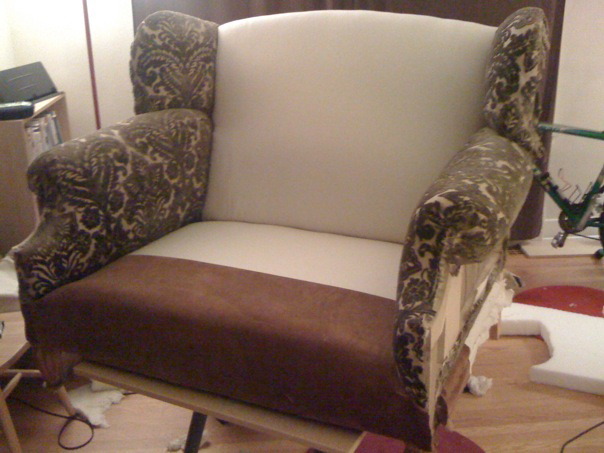
then nice cloth:

then nicer cloth:
n.b. for the foam rubber, around seattle you can go to pacific fabrics or joann’s, but I heartily recommend going to friendly foam over on Roosevelt in the U district. I’ve bought from them under both the old and new management, and the new owners remain quite friendly and knowledgeable. (and substantially neater…) they also have a much wider selection of foam types to choose from.
one interesting thing that I’ve learned since I started building furniture is the relative price and value of furniture pieces. when I first looked at the settee at Domaine, the chair was $3000. I thought that was a ridiculous price for a chair.
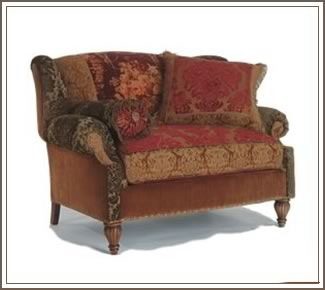
the original, from the now defunct Domaine.
Then I built one. it was a pretty good copy. the problem wast that by the time I was done, the copy had cost about as much as the original. plus it had taken many hours to build. go figure.
my copy, made from scratch
so anyway, I am now all the way across the country to retrieve an antique chaise lounge I have inherited and shipping it home. because a comparable new piece of furniture would probably cost even more than the above chair.
Consider this for a moment.
It is actually cheaper for me to fly across the country, buy the materials to build a very large crate, build it, and have it shipped professionally all the way back across the country, than it would be for me to buy that piece of furniture new. (or even used… (it is an antique after all.)) Does it make a statement about how much we as a society value furniture… or how little we value transportation. considering the technology needed to move a person 3000 miles in just a few hours…

you’ll have to wait til I get home to see the new chaise…

it started out to be a sailmaker’s bench, but went upscale somewhere…
The Problem with not planning your projects is that it generally means that you don’t know when you’re done. This project started out to be a Sailmaker’s bench, but if you look them up, you’ll see that I didn’t really conform to the ideal…
Working benches are a wonderful category of furniture. Sailmaker’s benches and Cobbler’s benches are of a variety of purpose-built furniture that tend to the less ornate end of the spectrum. but this does not restrict their complexity. The best examples are the ones that look like they were build for a very particular craftsman, (craftsperson if you like, but I’m going to skip over gender issues here, thank you… (you can just sort of assume I’m non-discriminatory…)) who probably started on a very simple, unmodified bench, and over the course of a (hopefully) successful and (more hopefully) happy lifetime of work was modified to be, or replaced by, purpose built to that particular person’s dimensions and habits. The needles go just here, stuck into a length of rope that was nailed to the surface, a corral was screwed on just here to keep small scraps from falling off the end of the bench, a hole was drilled here to hold the hammer, the edge has been worn off just here, etc. I went to an antique show some time back where there must have been four or five of the cobbler benches being sold as side or coffee tables. they varied from the simple, just a few little compartments in a corral area, to the ridiculous, with several tiers of little drawers, a cushioned leather seat, and heavily worn and darkened areas indicating that it was heavily used (or at least expertly antiqued…) Like many tools at antique shows, it was a bit sad that they weren’t being sold at a more practically minded venue.
So given that I’m building a boat, and preparing to do a lot of the associated tasks along the way, (rigging, sailmaking, etc.) I thought a good sailmaker’s bench would be useful… The design was constrained, as much of my recreational work is now, by the monstrous pile of inch-thick maple planks that a friend gave me a couple of years ago. (most of a tree actually.) but as I started to think of ideas, it occurred to me that I had never made sails before, (much less, cobbled.) And while I could scour google for images and references to sailmaker’s benches, I couldn’t really get more than an inkling for why certain things were where they appeared to be on the bench. I learned how to sew when I was young, but not in a trade environment, so I probably do things in a fairly non-traditional manner. I decided, or rather resolved, that I wasn’t going to make ‘a’ bench. I was going to make a test bed. this is my simple unmodified bench. somewhere in the near future is another bench. I have four sails to make, hopefully by the fourth sail, I’ll have sorted out what really needs to be a permanent fixture on a sailmaker’s bench and where it goes.
Watch this space for updates.