A little while ago, I posted a bit about a chair I built. One thing that was lacking about that chair was an ottoman. I actually built the frame of it a long time ago, and was convinced to let someone else finish it. now 2 or 3 years later, I got tired of waiting.
I finally finished turning and carving the legs, I finally decided that given the patchwork nature of the original upholstery job, it would be kind of fun to mismatch the legs.

On top, I decided that I would upholster this in a slightly less sprung way than the chair. The chair has a sprung deck, on top of which sits a sprung cushion, (see below.)
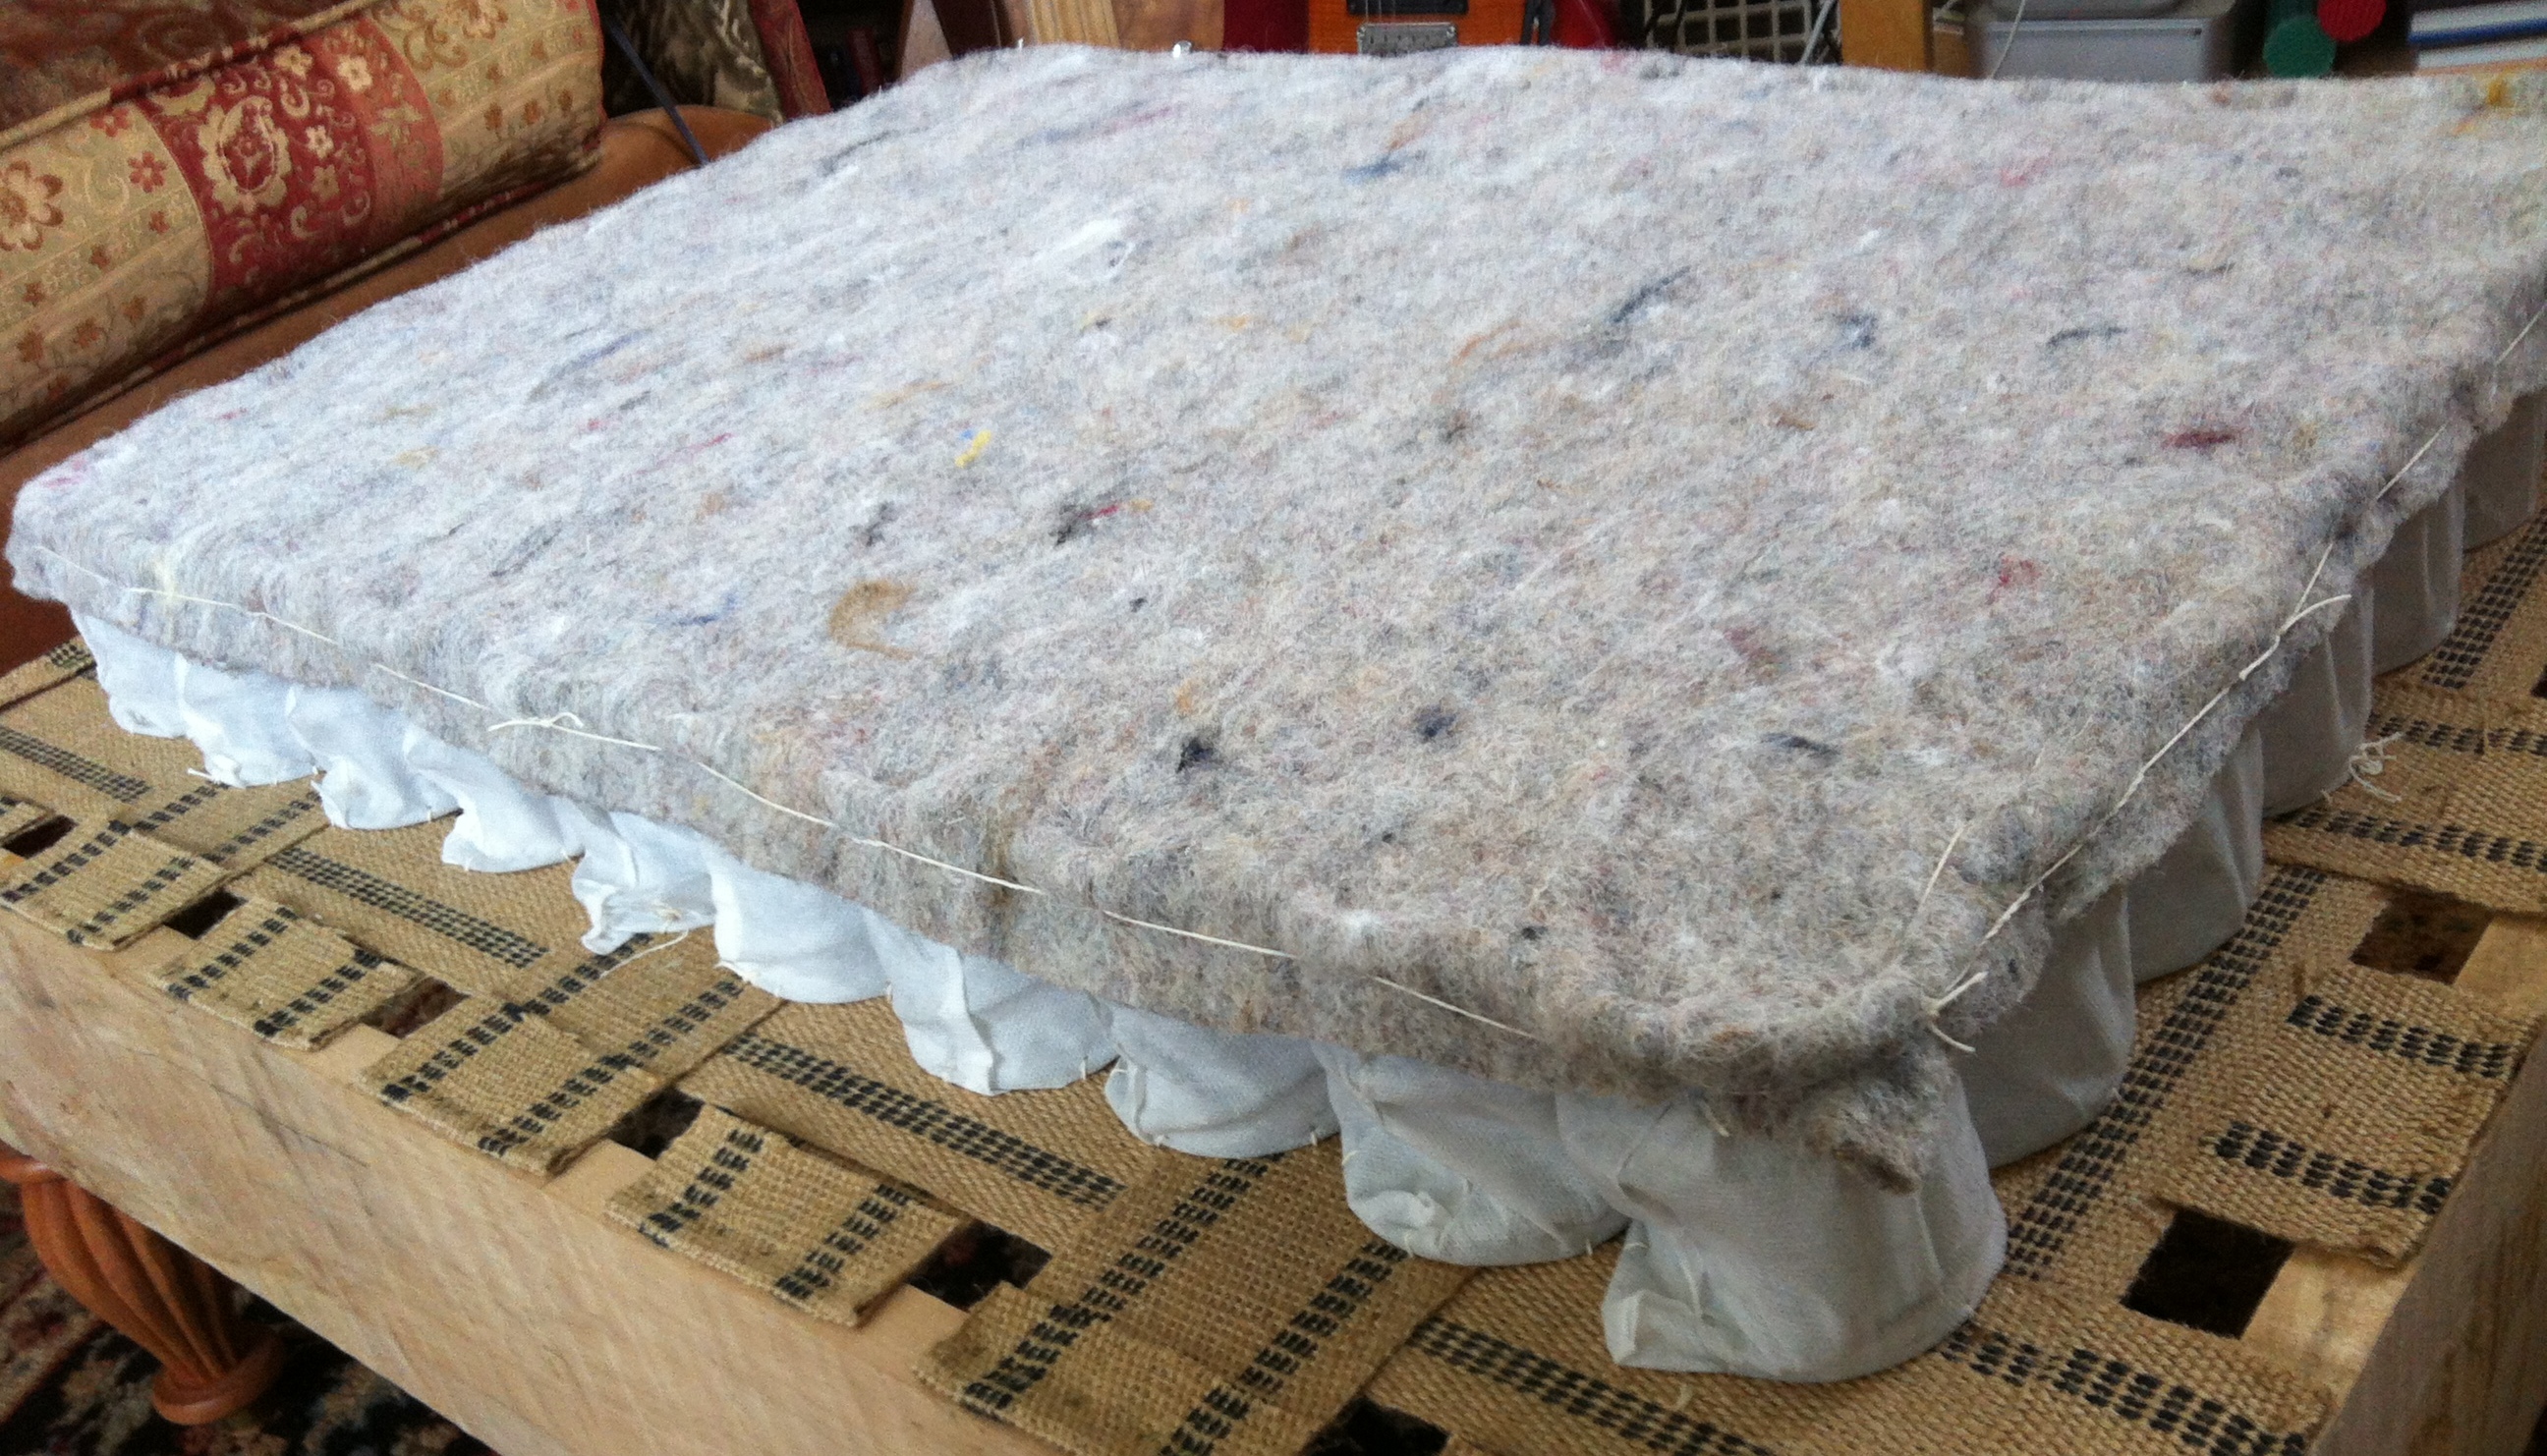
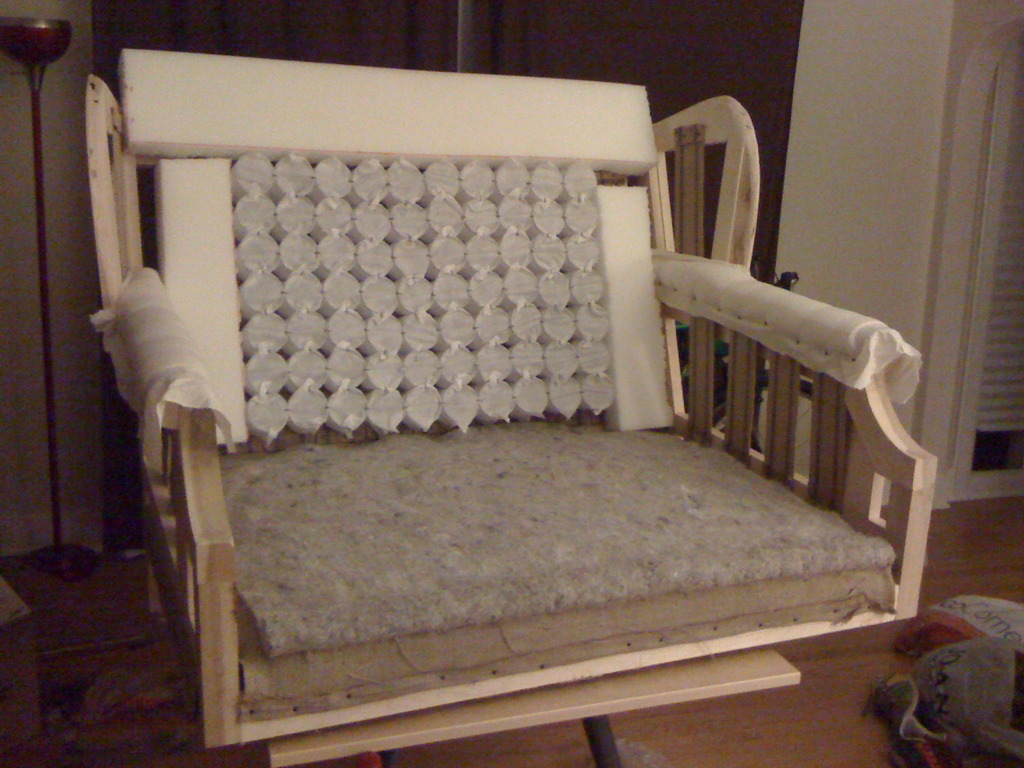
The hassock, by contrast, is getting a marshall unit, (pre-wrapped spring set,) 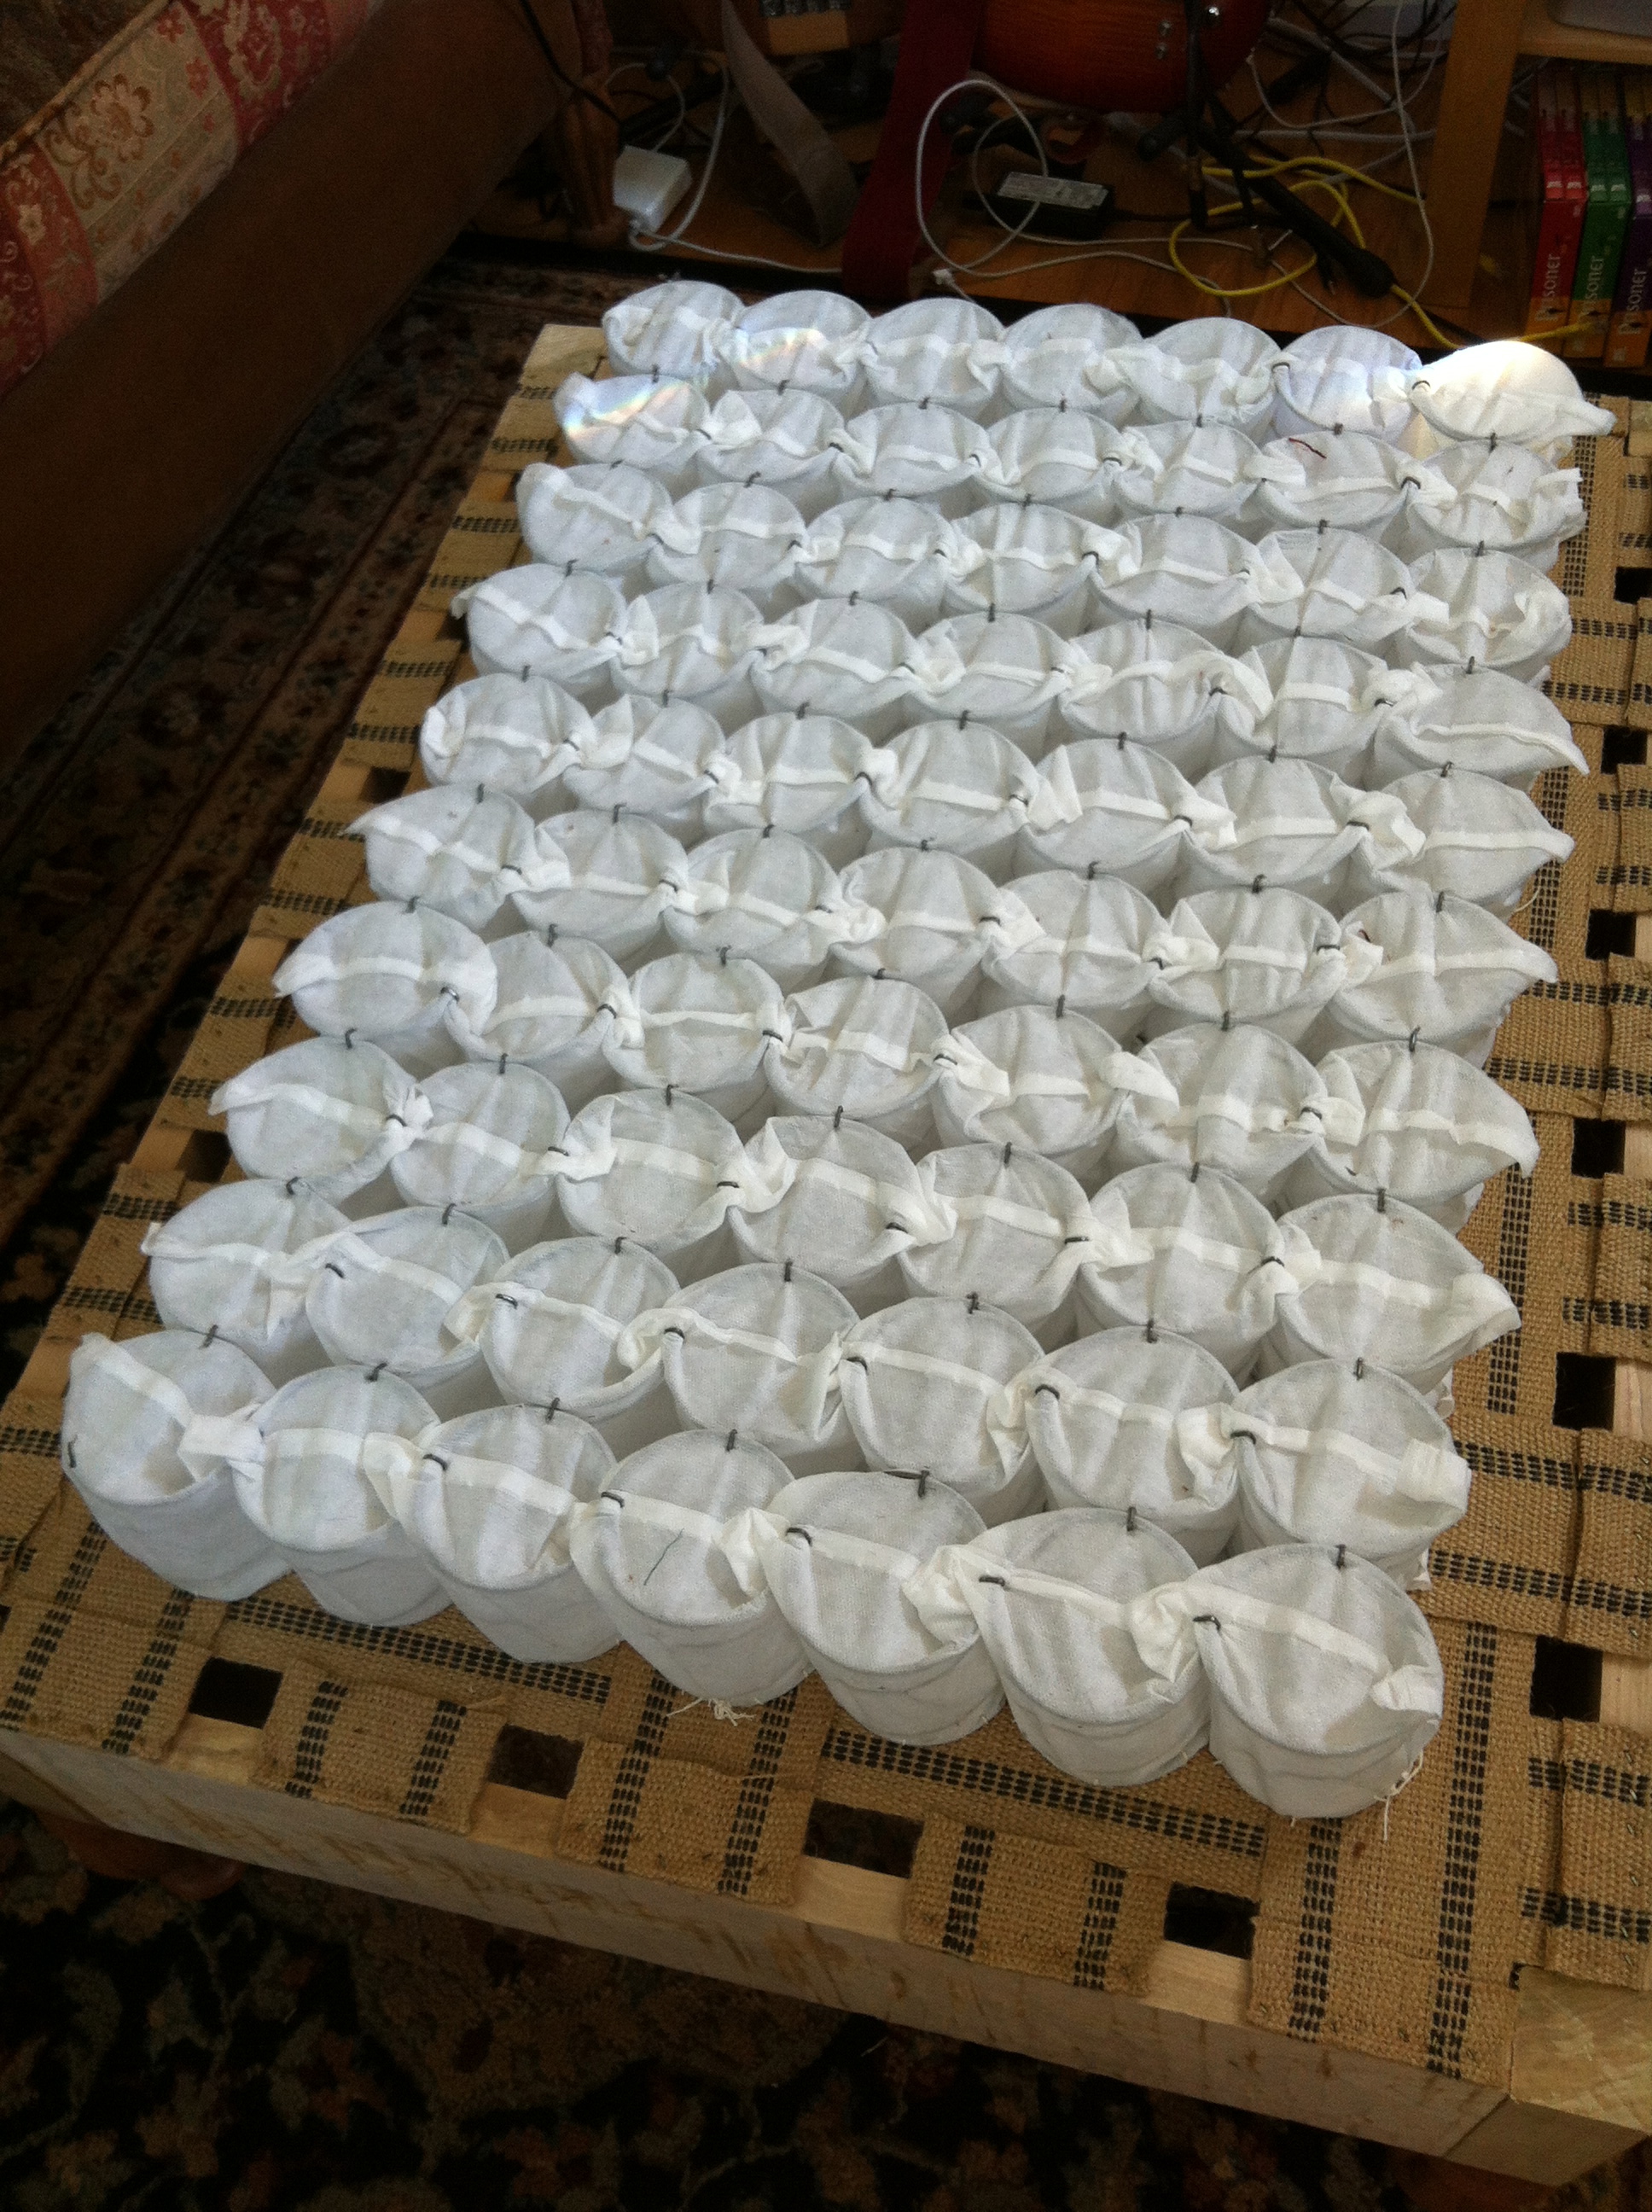 directly onto the webbing, then surrounded by felt, foam and cotton batting.
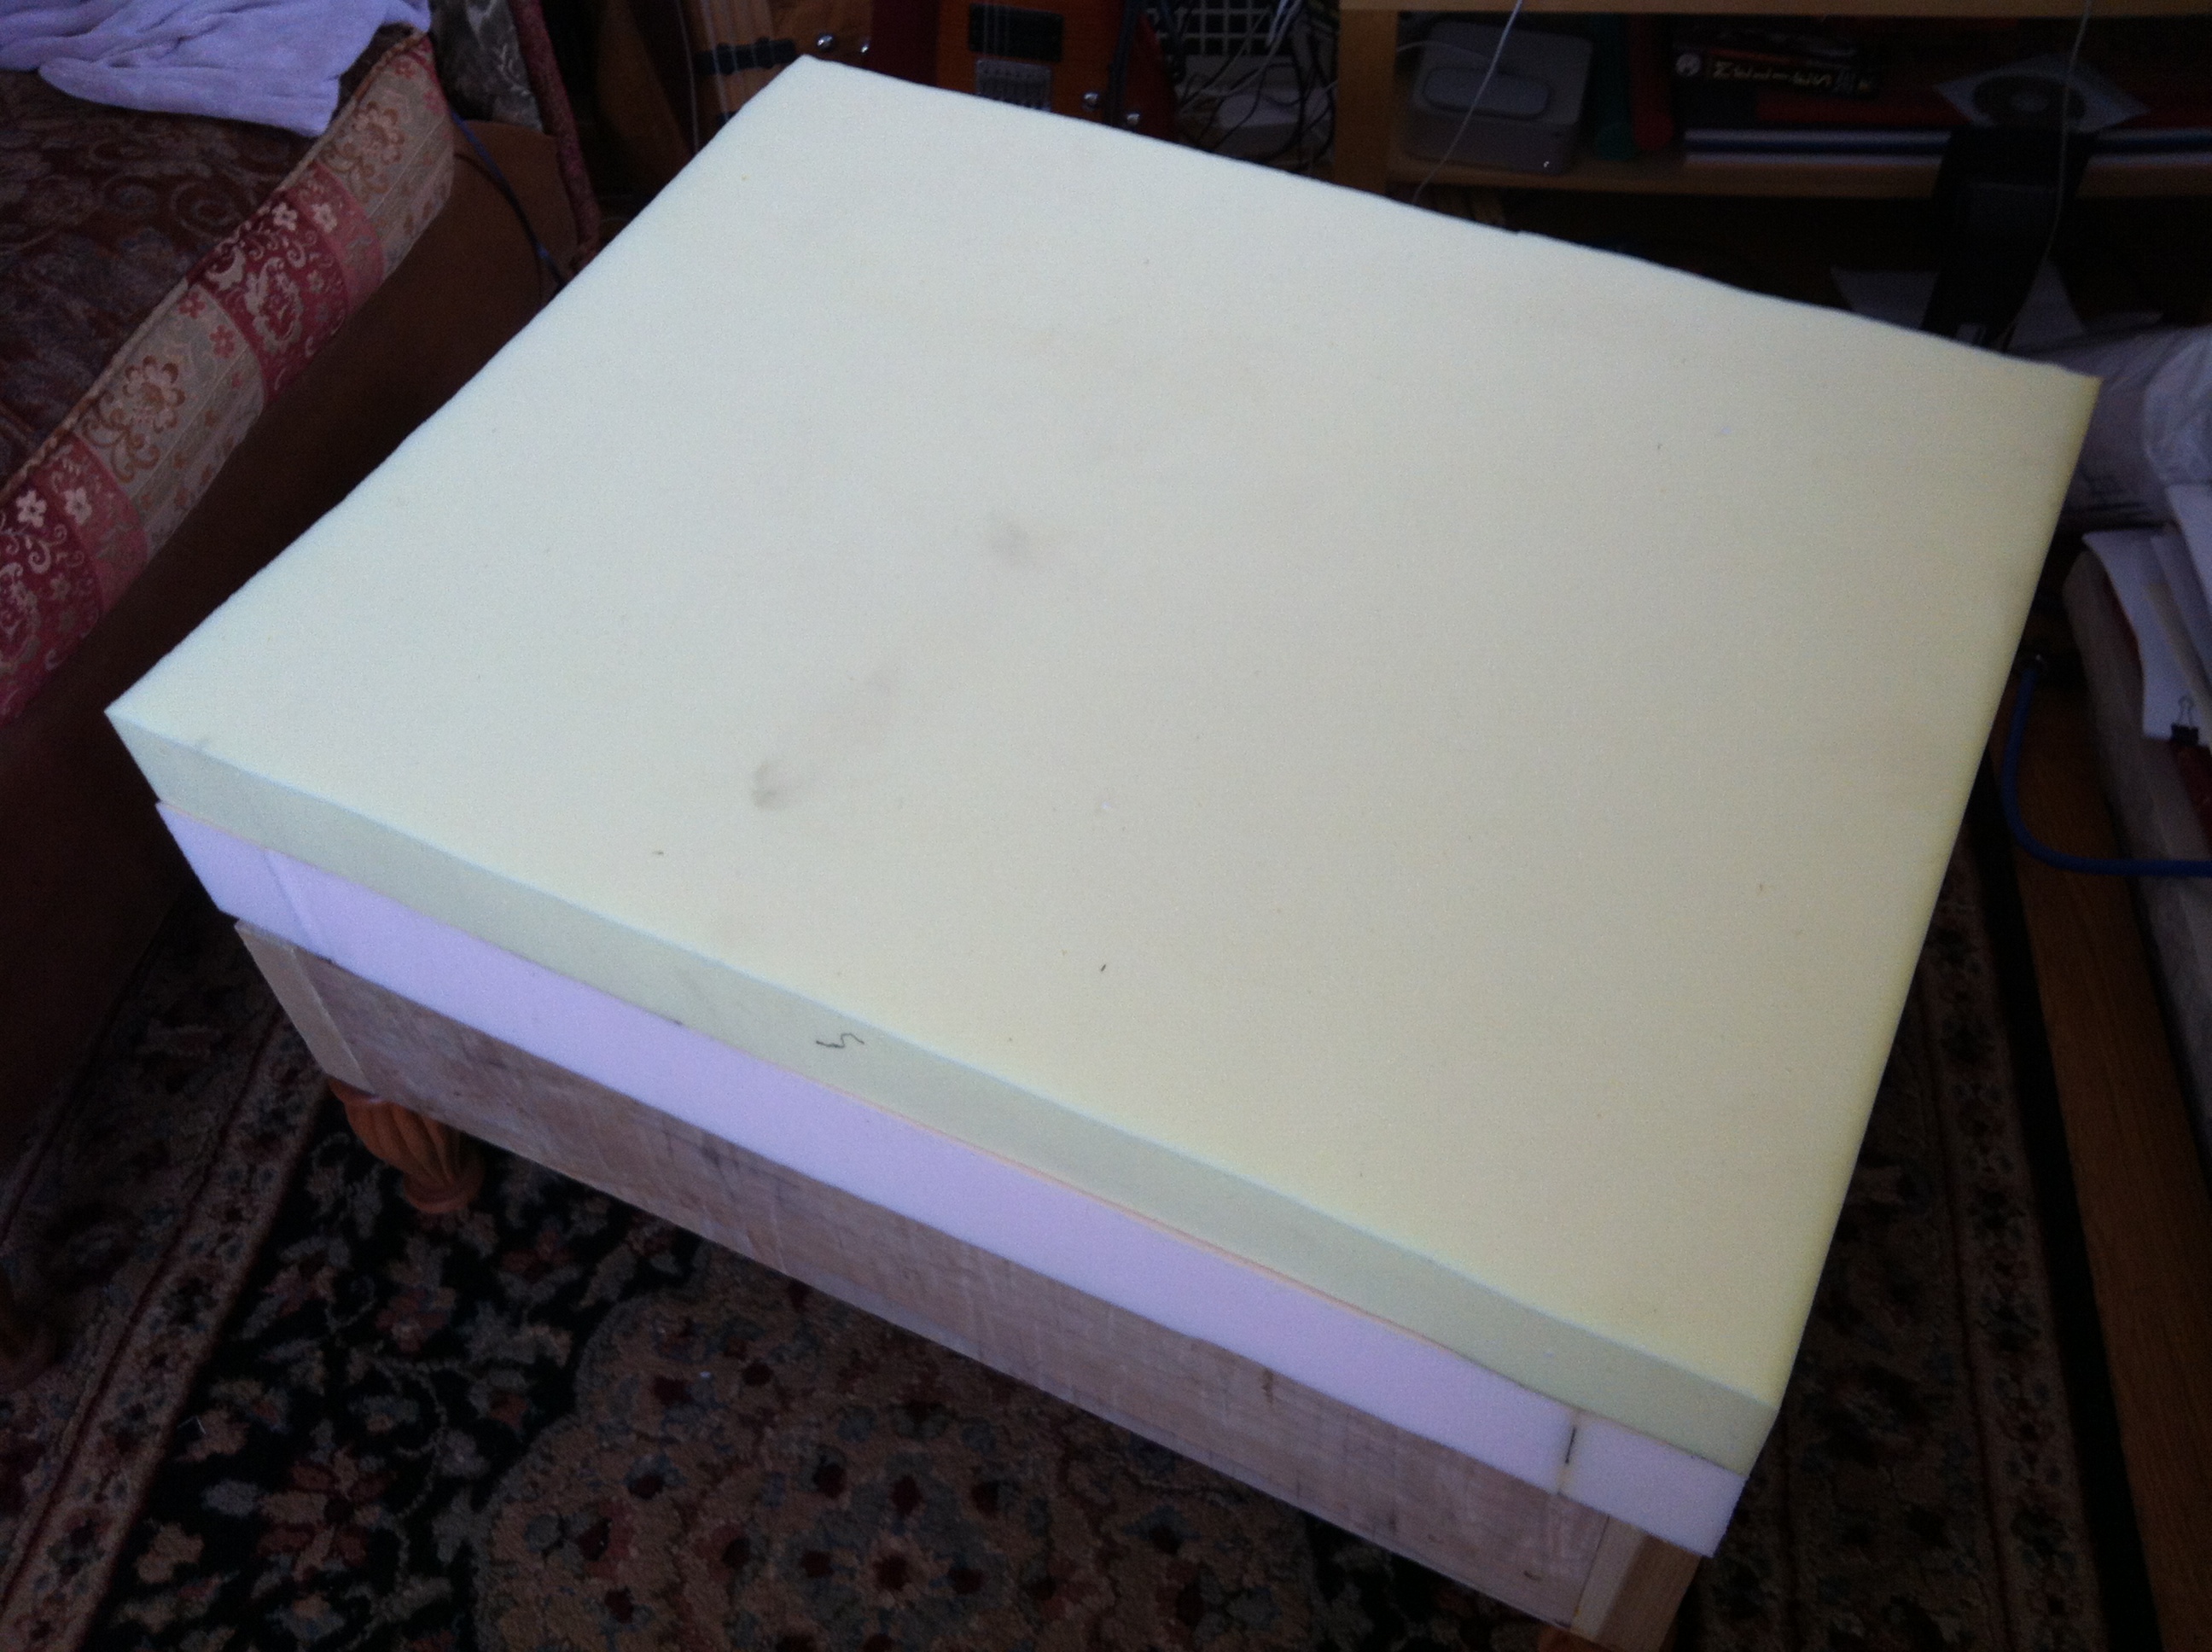 so far I’m up to the foam rubber. the next step is going to be to make a light weight calico bag for the cushion top that will encase the foam and a couple of layers of cotton batting so that I don’t have to worry about abrading the foam or messing anything up with the outer fabrics.
btw, here’s a basic rule of thumb about upholstery. it basically breaks down into a few simple steps. start with an uncomfortable frame. then add progressively less uncomfortable layers of padding wrapped in progressively finer fabrics until you’re done. so long as every layer is pretty secure before you go on to the next layer, the rules are pretty loose… sounds tongue-in-cheek, but it’s pretty much how it’s done. For example:
first the frame:
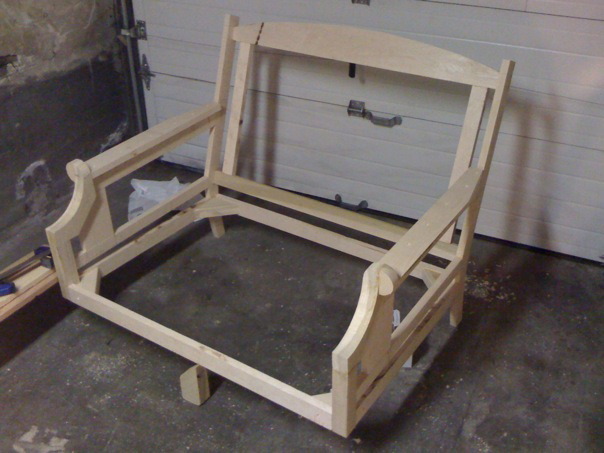
then webbing and springs:
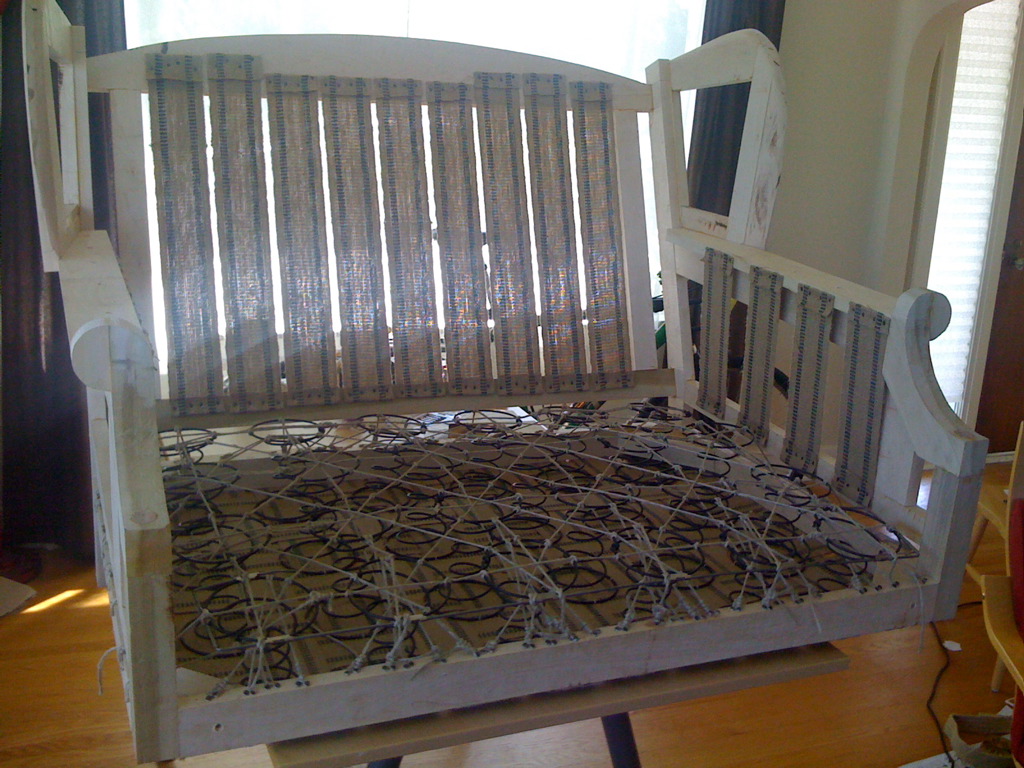
then burlap/felt:
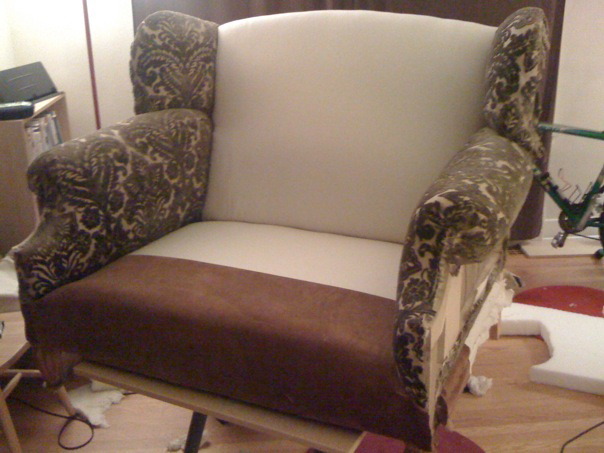
then nice cloth:

then nicer cloth:
n.b. for the foam rubber, around seattle you can go to pacific fabrics or joann’s, but I heartily recommend going to friendly foam over on Roosevelt in the U district. I’ve bought from them under both the old and new management, and the new owners remain quite friendly and knowledgeable. (and substantially neater…) they also have a much wider selection of foam types to choose from.
Hello,
I have been combing the internet for months now trying to find out how to build a wing back chair so that I may finally use that knowledge to build a wing-back head board. YOU WERE CORRECT there are tons of books all about reupholstering someone else’e chair but nothing on how to build one from scratch. Finally I have resorted to buying affordable used wing back chairs for the sole purpose of dismantling them to see how they went together. If you could share any information/photo you came across regarding how to build the frame for a wing-back chair I would be most obliged.
Thank you the amount have shared, it was wonderful.
Kind regards,
Andrea
Hey! my first legitimate comment!
I’m not sure how much I can add to what is pictured here. one thing that I *have* found that makes things easier is the secondary frame edges on the back of the chair, which allow you to pull the fabric through the back without interfering with the padding of the back cushion itself. if you look at the picture of the bare frame above, I’m referring to the vertical bars just inside the ends of the back. you can build and upholster the frame without, but it does make it much easier.
Restoration Hardware did a series of furniture the last couple of years that was called “deconstructed”. it wasn’t very pretty, but it was a good primer course on how the frames were supposed to look. if you can find a catalog from the last couple of years, it’s a worthwhile reference.
One other thing I found was going to certain antique stores, especially the really big ‘mall’ type antique stores, there were almost invariably some damaged, unupholstered furniture around to study. good for referencing which parts should have been built up more than it was.
Next, I just went to a local upholstery shop and asked questions. there’s a good chance that they’ll have some good reference material.
What I eventually found out was that
the nice thing, upholstered frames are actually easier, because you don’t have to worry so much about how it looks. because it’s all going to be covered by quite a lot of padding and fabric. the only caveat to that I might add is that you probably want to use slightly sturdier lumber than for non-upholstered furniture, because the webbing is really under quite a lot of tension. in retrospect, I wish I had built up the bottom frame of this chair a bit more. it really needed to be at least 1 1/2″ thick, rather than the 7/8″ it is. it flexed a lot more than I would have liked when I added the webbing.
if you have any specific questions, I’ll see if I can answer them, though I am far from an authority. so long as you go basically, Deck, Arms, Wings, Back, you should be okay.
cheers!