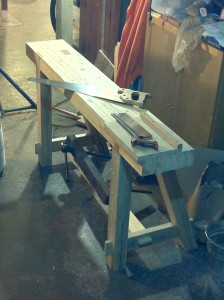
thought that it might be worth a try to construct a more traditional workbench, just to see if any of the multitude of words spilled on the subject were actually worth anything.
starting from an episode of the woodwright’s shop and a large shipping crate that had served it’s purpose, I resolved to build a simple french style workbench. I used this particular size of bench as it was designed to be relatively narrow. and I only had 8 or so 2x4s to work with. much has been said about what wood you should use for the top of a workbench. I prefer what I have available…
the first step was to laminate the top. since I was going to be flattening the top facing surface when I was done anyway, but I wanted the underside joinery to be regular, I clamped the 7 2x4s together with the uglier sides facing the table top. this meant that the bottom of the table would be pretty flat without having to do any work on it. I planed the mating faces lightly for a good glue surface and laid it up.
second step was to figure out the legs. the only addition I made to Underhill’s original was to add a ‘trestle’ stretcher between the legs, rather than a tool box. though you never know, I might add one later… for the technically curious who might wonder what angle the back leg is at, it’s at whatever angle it takes to get the leg to stay under a 9″-11″ wide tool tray that has as yet not been added. (if you really must know, it’s in the vicinity of 70º.) the bigger question should be “how tall is it?” and “does it make a difference?” Answers: “just shy of grazing my knuckles when standing relaxed with my arms by my side,” and, “Hell yes.” proper table height for a particular task is a worthing thing to spend some time figuring out. your back will thank you… quickly…


Pingback: Workbench Additions | Things Made