Category Archives: Boat building

what to do with scraps

adirondack_chair_small
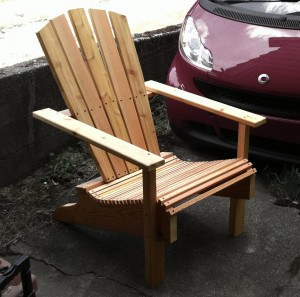
I’m told that one of the indispensable tools in a workshop is a flop chair. the concept being that you need somewhere to sit when you can’t think of what you’re supposed to do next, or have come to the inescapable conclusion that you shouldn’t have done what you just did…

this is now mine.

It’s mostly made up of what used to be parts of a mold from the early construction of the boat. so 2″x10″ scraps.

It fits me perfectly, I sat on a chair and measured up from the floor to the back of my knee for the height of the front of the seat and guessed at the rest.  definitely done with little regard for aesthetics and finish, so the screw holes are not bunged, the wood in the back is whatever happened to be around at the time. happily, when you’re sitting in it, you can’t see it…

On the other hand, I now have a pattern for a chair that fits me, that I can measure and adapt when making any similar furniture.  in deference to shorter people, the seat height could be a little lower, but the seat and back angle are a very good starting point for the next attempt that might actually take looks and finish into consideration.

I do have a lot more molds to dispose of…

success!

the centerboard fit!

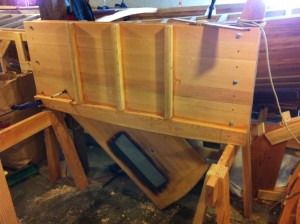
centerboard trunk fitting

granted, if you read pete culler on boats, I have followed the textbook definition of how not to build the trunk…

just have to drill for the keel bolts and coat the rest of it in epoxy and in it goes.

making charcoal

well, char… or bio-char as it is now popularly known.

fairly simple process as it turns out. what you basically need to do is to have a nearly sealed fireproof container that contains the wood you want to convert to charcoal and you need a heat source to cook it. handily one of the by products of cooking wood is a bunch of flammable gasses, and the quicker amongst you can probably already see where this is going.  the trick is to direct the gasses into the flames that are heating the soon-to-be-charcoal. the simplest  way that I’ve found so far is described at the New England Biochar website.

it breaks down to the following steps.

  1. fill a small metal bucket with the wood you wish to convert.
  2. invert small bucket inside slightly wider and taller second metal bucket that has a line of airholes punched into the bottom edges.
  3. surround the inner bucket with kindling. the trick here is to figure out just how much. too much and there is lots of smoke. too little and the inner bucket wont get hot enough.
  4. light several parts of the kindling so that the fire will burn relatively evenly.
  5. adding a lid with a chimney will make the whole process more efficient.
just after ignition

just after ignition

basically what happens is that the outer layer of fire heats the inner bucket. inside the inner bucket the wood cooks, releasing quite a large amount of flammable gas, this gas seeps out the inner bucket, and is ignited by the already burning wood to further heat the now toasty warm wood.  eventually, the fire burns itself out.  it’s very important to wait until the inner bucket cools down before opening it. the smoldering wood might suddenly catch fire.  that’s what I’m waiting for now.  more news later…

It goes where?

'Sailmaker's Bench'

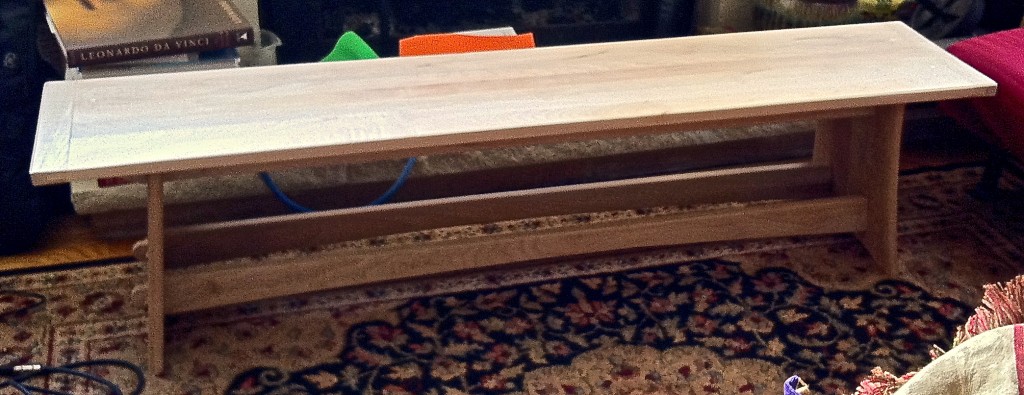
it started out to be a sailmaker’s bench, but went upscale somewhere…

The Problem with not planning your projects is that it generally means that you don’t know when you’re done.  This project started out to be a Sailmaker’s bench, but if you look them up, you’ll see that I didn’t really conform to the ideal…

Working benches are a wonderful category of furniture. Sailmaker’s benches and Cobbler’s benches are of a variety of purpose-built furniture that tend to the less ornate end of the spectrum.  but this does not restrict their complexity.  The best examples are the ones that look like they were build for a very particular craftsman, (craftsperson if you like, but I’m going to skip over gender issues here, thank you… (you can just sort of assume I’m non-discriminatory…)) who probably started on a very simple, unmodified bench, and over the course of a (hopefully) successful and (more hopefully) happy lifetime of work was modified to be, or replaced by, purpose built to that particular person’s dimensions and habits. The needles go just here, stuck into a length of rope that was nailed to the surface, a corral was screwed on just here to keep small scraps from falling off the end of the bench, a hole was drilled here to hold the hammer, the edge has been worn off just here, etc.  I went to an antique show some time back where there must have been four or five of the cobbler benches being sold as side or coffee tables.  they varied from the simple, just a few little compartments in a corral area, to the ridiculous, with several tiers of little drawers, a cushioned leather seat, and heavily worn and darkened areas indicating that it was heavily used (or at least expertly antiqued…) Like many tools at antique shows, it was a bit sad that they weren’t being sold at a more practically minded venue.

So given that I’m building a boat, and preparing to do a lot of the associated tasks along the way, (rigging, sailmaking, etc.) I thought a good sailmaker’s bench would be useful… The design was constrained, as much of my recreational work is now, by the monstrous pile of inch-thick maple planks that a friend gave me a couple of years ago. (most of a tree actually.) but as I started to think of ideas, it occurred to me that I had never made sails before, (much less, cobbled.) And while I could scour google for images and references to sailmaker’s benches, I couldn’t really get more than an inkling for why certain things were where they appeared to be on the bench. I learned how to sew when I was young, but not in a trade environment, so I probably do things in a fairly non-traditional manner.  I decided, or rather resolved, that I wasn’t going to make ‘a’ bench.  I was going to make a test bed.  this is my simple unmodified bench.  somewhere in the near future is another bench. I have four sails to make, hopefully by the fourth sail, I’ll have sorted out what really needs to be a permanent fixture on a sailmaker’s bench and where it goes.


Watch this space for updates.
Yes, it fits out the door

Consequence right side up.

for the curious…

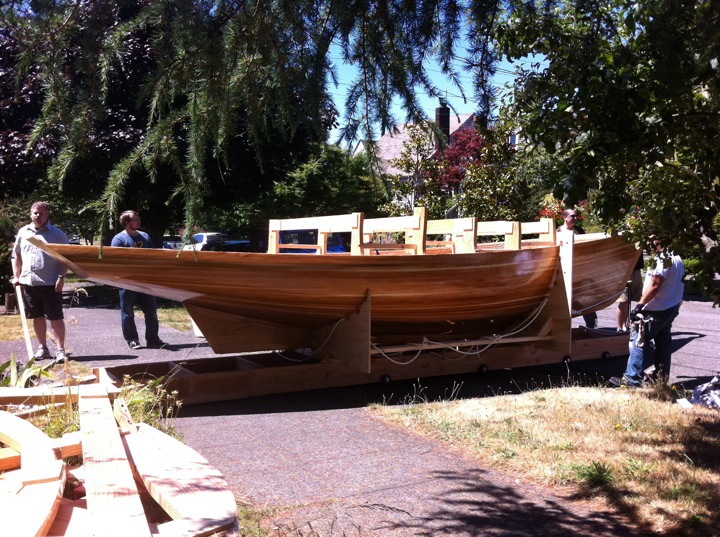
one of the first questions I get from people on telling them that I’m building a boat in the basement is, “Will it fit out the door?”

so in an effort to curtail future asking of that question, (or at least curtail future answering of that question,) I offer this image as proof that it will indeed fit out the door.

or at least it did then…  I’m pretty sure it will do so again…