Author Archives: psgouros

Sketching

I’ve been going to a life drawing class lately.

IMG_4779

(You can tell I’m years out of practice…)

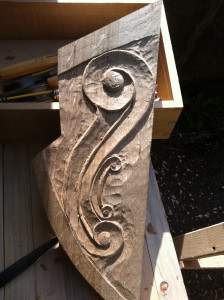
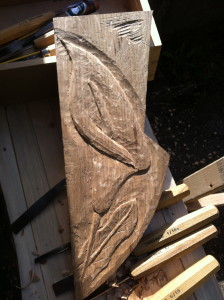
In addition to that, I’ve been doing a bit of wood carving.  (decorative hanging knees for the boat…)

IMG_4776 IMG_4774

Both of these endeavors have started me sketching again. while I’ve been at it, I’ve been thinking about what makes sketching a pleasurable way to work out problems, and whether or not that experience can successfully be translated to a touchscreen device.  Last year I did a considerable amount of work on a storytelling application, only to realize that at the time it was a bit beyond my capacity.  I have somewhat more manageable idea now, based on the series of sketches I did as preliminaries to the wood carving.  I realize that having to draw to a brief, or at least within a certain set of restrictions involves a fair amount of repetition. and performing repetitive tasks is what computers are all about…  so watch this space. I may need a beta tester.

though realistically, this isn’t going to happen very quickly, I have a hobby…

Acanthus leaves

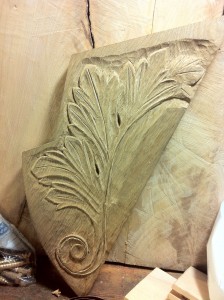
Acanthus leaves are a common part of classical decoration. Part of the classical Corinthian style, they area a motif that has aged well, and can be made to look both classic and modern, sometimes simultaneously.

Acanthus leaf carving

curiously, much of the acanthus in decor bears little actual resemblance to the leaves of the acanthus plant. This example from the Palatine hill in Rome is a pretty good example.

I have not done a particularly good job of aping the original plant or even the classical motif, but over all I think I got the basic flavor about right…

pictured is one of a set of hanging knees supporting the deck of my boat in the cockpit area. once the deck goes on, this will not be readily visible to anyone who is not crawling around where they shouldn’t be, but it seemed worth it nonetheless. 17 more to go, but I’ll be trying out a different design on each one.

Maybe sometime I’ll add something about my carving technique, but for an initial bit of free info, carving in dry white oak is more than a little bit of a pain in the ass…

details, details…

The nice thing about building your own boat is that you can add little things everywhere…

IMG_4750


there are a lot of parts to the boat that will likely never be seen by anyone ever again once the deck goes on, but sometimes I feel that they need a little extra attention anyway.  I remember the big deal that the Art History teachers made of the fact that the pediment sculptures on the Parthenon were sculpted in the round despite the fact that no one would ever see the backs of them when they were inset into a gable 40 feet over your head.  theoretically to appease the gods, but I suspect more likely that the sculptors just couldn’t leave well enough alone… or were being paid by the hour…

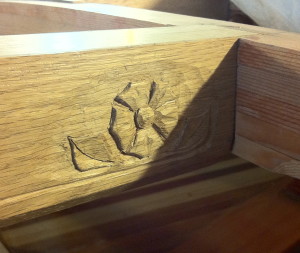
so in this case, on the side of the oak cockpit frame, roughly where your feet would get to if you were completely tucked under the seats sleeping, goes this little flower.

there will probably be more…

side note: two things that this has taught me are a) having a selection of gouges is important, and b) gouges are bloody expensive…

James May’s Man Lab

I’ve recently become enamored of James May’s Man Lab. Well worth the viewing, even if you fast forward over some of the more sociological (and cringeworthy) bits of the show. the actual making of things is great.

and somehow it doesn’t come off as patronizing… why oh why is there not this kind of programming on this side of the pond… or for that matter why oh why will the bbc not let me pay a license fee for the iplayer out here in the pacific northwest?

Precision Technology

precision drilling

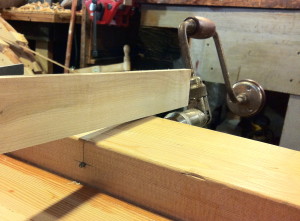
right on the mark from the far side!  I was allowing myself about an 1/8″ leeway in hitting the mark, but spot on!  out of the 12 holes drilled, I was less than a millimeter off with 9 of them the other 3 were just inside my allowed limits. interestingly I had the most trouble with the holes on the left end of the pieces.  not sure why.

brings up the idea of when to use a power drill and when to use a manual brace and bit. in principle, I have no particular preference, I have both. but I think that if you’re particularly worried about getting it straight, (and being able to correct on the fly,) the brace is the only way to fly. not to mention it’s a lot quieter…


what to do with scraps

adirondack_chair_small
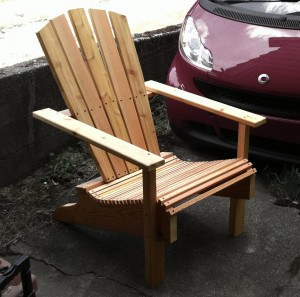
I’m told that one of the indispensable tools in a workshop is a flop chair. the concept being that you need somewhere to sit when you can’t think of what you’re supposed to do next, or have come to the inescapable conclusion that you shouldn’t have done what you just did…

this is now mine.

It’s mostly made up of what used to be parts of a mold from the early construction of the boat. so 2″x10″ scraps.

It fits me perfectly, I sat on a chair and measured up from the floor to the back of my knee for the height of the front of the seat and guessed at the rest.  definitely done with little regard for aesthetics and finish, so the screw holes are not bunged, the wood in the back is whatever happened to be around at the time. happily, when you’re sitting in it, you can’t see it…

On the other hand, I now have a pattern for a chair that fits me, that I can measure and adapt when making any similar furniture.  in deference to shorter people, the seat height could be a little lower, but the seat and back angle are a very good starting point for the next attempt that might actually take looks and finish into consideration.

I do have a lot more molds to dispose of…

success!

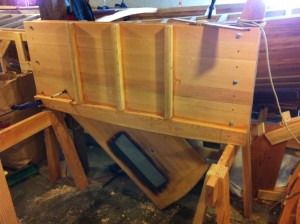
the centerboard fit!

centerboard trunk fitting

granted, if you read pete culler on boats, I have followed the textbook definition of how not to build the trunk…

just have to drill for the keel bolts and coat the rest of it in epoxy and in it goes.

making charcoal

well, char… or bio-char as it is now popularly known.

fairly simple process as it turns out. what you basically need to do is to have a nearly sealed fireproof container that contains the wood you want to convert to charcoal and you need a heat source to cook it. handily one of the by products of cooking wood is a bunch of flammable gasses, and the quicker amongst you can probably already see where this is going.  the trick is to direct the gasses into the flames that are heating the soon-to-be-charcoal. the simplest  way that I’ve found so far is described at the New England Biochar website.

it breaks down to the following steps.

  1. fill a small metal bucket with the wood you wish to convert.
  2. invert small bucket inside slightly wider and taller second metal bucket that has a line of airholes punched into the bottom edges.
  3. surround the inner bucket with kindling. the trick here is to figure out just how much. too much and there is lots of smoke. too little and the inner bucket wont get hot enough.
  4. light several parts of the kindling so that the fire will burn relatively evenly.
  5. adding a lid with a chimney will make the whole process more efficient.
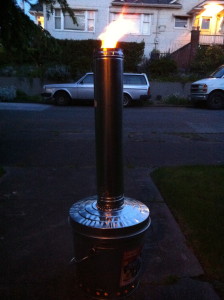
just after ignition

just after ignition

basically what happens is that the outer layer of fire heats the inner bucket. inside the inner bucket the wood cooks, releasing quite a large amount of flammable gas, this gas seeps out the inner bucket, and is ignited by the already burning wood to further heat the now toasty warm wood.  eventually, the fire burns itself out.  it’s very important to wait until the inner bucket cools down before opening it. the smoldering wood might suddenly catch fire.  that’s what I’m waiting for now.  more news later…